Complex UV Layout in Maya
Over the last couple of years UV layout in Maya has changed for the better. In this course we're going to be taking a look at some of those changes as we UV map an entire character
# 1 08-08-2005 , 01:35 AM
Subscriber
Join Date: Jul 2005
Posts: 26

WIP Dog Tutorial

hi guys
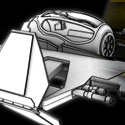
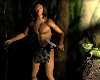
im a newbie to maya and this is like my second model
its not the best but im getting there..
tell me what you guys think
user added image
user added image
user added image

i want to start texturing...
i kinda get the whole UV mapping thing
but its killing me because i dont know how to do it
i saw Mike's tut on texturing and how he cut his character into 3 parts.. legs.. torso.. and head..
when i try to do that something is differnt
lets say i select the faces of the head and neck
then i go to extract.. in his tut.. he gets 2 different objects.. i dont.. for me its still ONE object.. but.. not connected..
thats kinda bugging me..
can any1 help me out.. tell me how i should UV map this guy, i know there have been many threads on this.. lol but its a tough one.
ive been looking thru some threads and i saw this one
https://forum.simplymaya.com/showthre...g&pagenumber=3

and im wondering how he got that uv layout like that
how did he begin.. planar mapping?

this is what i get when i do automatic mapping
user added image
now thats the whole dog.. and its confusing.. when people make characters or high quality models.. do they UV map the model as one thing.. or they seperate it.. like lets say... the two legs.. arms.. maybe ears or face or something i dont know... how do they do it..?? and then how do they put it back together? wont the UV coordinates interfere with the the parts of the model when u combine them...

Mikes tutoruial on texturing is great... and thats how i kinda figured it out.. but he did a really simple face.. he didnt have to stich together the nose and ears and stuff in the UV editor.. if we're just using the face to texture i know that u kinda have to move them around and stich them... but what about the parts that are behind the front of the face... how do u get those to be facing u :-/ errrr
il just stop here and hope some1 responds...

sry for the long post.. i kinda got carried away :-p

# 2 08-08-2005 , 03:21 PM
Subscriber
Join Date: Jul 2005
Posts: 26
hey now i got another annoying problem...
i figured how to cut him into pieces
but when i do and i look inside.. i see thru his skin
how do i turn that off so that i see the inside of his body
look
user added image
user added image

# 3 09-08-2005 , 01:36 AM
Subscriber
Join Date: Jul 2005
Posts: 26
no one has any helpful tips or suggestions?

# 4 09-08-2005 , 02:15 AM
Shadeblade's Avatar
Registered User
Join Date: Mar 2005
Location: Grande Prairie, Alberta, Canada
Posts: 779
Sorry, I'm not too sure how to fix that problem.user added image But, try changing your screen size settings in Control Panel-->Display---Settings. You'll probably find something there user added image


Nobody felt like avenging your death. Sorry.
# 5 09-08-2005 , 05:26 AM
alienscience's Avatar
Subscriber
Join Date: Nov 2004
Location: In the middle of nowhere in VA
Posts: 749
See through his skin? What exactly do you mean? Could you have accidently deleted some faces or something? Maybe try going to shading->shading options->x-ray. Its on the viewport menus.


Hmm, actually I never HAVE done this tutorial. Probably should, looks very intriguing, lol spelled that one wrong.

# 6 09-08-2005 , 05:38 AM
Subscriber
Join Date: Jul 2005
Posts: 26
well hmm.. lets see how i could explain it
in my last post i attached 2 pictures of the dogs head
i also detached his nose.... what do u see when u look thru his nose.. u see thru the dogs skin thru the left or right side of his head... it looks as tho there are no faces there... but there are.. its a full head.. its just that i see thru them when im lookin out from the inside of an object.. :-/ err hope that kinda explained it easier

# 7 09-08-2005 , 01:25 PM
Shadeblade's Avatar
Registered User
Join Date: Mar 2005
Location: Grande Prairie, Alberta, Canada
Posts: 779
Maybe when you put the nose back on it won't be a problem. user added image


Nobody felt like avenging your death. Sorry.
# 8 12-08-2005 , 03:44 PM
antiant's Avatar
Subscriber
Join Date: Feb 2004
Location: Melbourne
Posts: 462
hmm now with your not being able to see from inside of the model, i know that if you have back face culling turned on it will give you that problem. You can turn it on and of here..

Display
Custom Polygon Display - click option box
scroll down and turn backface culling off.

hope this fixes your problem. If not, it maybe something to do with the way you have applied your uv mapping. Try giving it automatic mapping then re apply the uvmapping again. That works for me.


There's nothing normal about normals. In FACT i think the are abnormal.
# 9 13-08-2005 , 01:23 PM
Subscriber
Join Date: Aug 2004
Posts: 42
seems to me like you need a double-sided material applied to it =)

~and as for the UV, I also am yet to watch the tut... but normally after the UV's are mapped/packed like that.. you can select particular faces of the dog you want to unwrap better and then planar map them... then sew them together. ~


Last edited by hopesfall; 13-08-2005 at 01:27 PM.
Posting Rules Forum Rules
You may not post new threads | You may not post replies | You may not post attachments | You may not edit your posts | BB code is On | Smilies are On | [IMG] code is On | HTML code is Off

Similar Threads