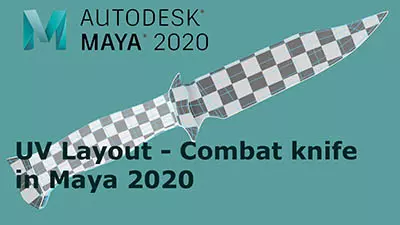
Complex UV Layout in Maya
Over the last couple of years UV layout in Maya has changed for the better. In this course we're going to be taking a look at some of those changes as we UV map an entire character
#
16
21-10-2006
, 11:08 AM
Registered User
Join Date: May 2006
Join Date: May 2006
Location: Hastings UK
Posts: 895
#
17
21-10-2006
, 02:22 PM
Registered User
Join Date: May 2006
Join Date: May 2006
Location: Hastings UK
Posts: 895
Crits and comments are much appreciated
Cheers Leon
#
18
21-10-2006
, 02:24 PM
looks nice... i ahvent studied the actual tire so i'll have to get back to you on that
G
#
19
22-10-2006
, 09:03 AM
Registered User
Join Date: May 2006
Join Date: May 2006
Location: Hastings UK
Posts: 895
Crits and comments are always welcome
#
20
23-10-2006
, 01:09 AM
Registered User
Join Date: May 2006
Join Date: May 2006
Location: Hastings UK
Posts: 895
#
21
23-10-2006
, 01:10 AM
Registered User
Join Date: May 2006
Join Date: May 2006
Location: Hastings UK
Posts: 895
#
22
25-10-2006
, 07:51 PM
Registered User
Join Date: May 2006
Join Date: May 2006
Location: Hastings UK
Posts: 895
#
23
26-10-2006
, 09:55 AM
Registered User
Join Date: May 2006
Join Date: May 2006
Location: Hastings UK
Posts: 895
#
24
26-10-2006
, 04:16 PM
Registered User
Join Date: May 2006
Join Date: May 2006
Location: Hastings UK
Posts: 895
#
25
27-10-2006
, 10:21 AM
Registered User
Join Date: May 2006
Join Date: May 2006
Location: Hastings UK
Posts: 895
#
26
27-10-2006
, 10:58 AM
#
27
28-10-2006
, 06:31 PM
Registered User
Join Date: May 2006
Join Date: May 2006
Location: Hastings UK
Posts: 895
Cheers for the response vladimirjp, keeps me going.
#
28
29-10-2006
, 06:51 AM
can't think of anything else to say man...keep it goingOriginally posted by vladimirjp
this is sick.
nice work.

G
#
29
29-10-2006
, 08:09 AM
How did you do the tyres? Modelled? or Displaced?
Can we possibly see some wires please?
Keep it up!
Kevin
#
30
29-10-2006
, 03:02 PM
Registered User
Join Date: May 2006
Join Date: May 2006
Location: Hastings UK
Posts: 895
Thanks for the comments guys it is much appreciated.
Posting Rules Forum Rules
Similar Threads
Batman tutorial WIPS
by David in forum Work In Progress replies 2 on 12-11-2016
Batman
by mastone in forum Work In Progress replies 3 on 07-11-2013
Saw Batman? Thoughts? (caution, spoilers possible)
by ragecgi in forum Maya Basics & Newbie Lounge replies 39 on 02-08-2008
Batman Begins, new movie
by Alan in forum Maya Basics & Newbie Lounge replies 7 on 01-04-2004
Batman W.I.P
by RisTar in forum Work In Progress replies 2 on 12-03-2004
Topics
Free Courses
Full Courses
VFX News
How computer animation was used 30 years ago to make a Roger Rabbit short
On 2022-07-18 14:30:13
Sneak peek at Houdini 19.5
On 2022-07-18 14:17:59
VFX Breakdown The Man Who Fell To Earth
On 2022-07-15 13:14:36
Resident Evil - Teaser Trailer
On 2022-05-13 13:52:25
New cloud modeling nodes for Bifrost
On 2022-05-02 20:24:13
MPC Showreel 2022
On 2022-04-13 16:02:13


