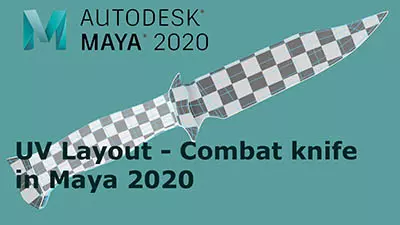
Maya for 3D Printing - Rapid Prototyping
In this course we're going to look at something a little different, creating technically accurate 3D printed parts.
#
1
21-07-2005
, 12:29 PM
July/August - Normal - JoeD8349
My idea is to have an elephant in the zoo, standing atop a rock, deathly afraid of a little mouse that is below him, who is just innocently chewing on something. Here is my sketch. I just hope I can find time to finish.
#
3
21-07-2005
, 04:29 PM

Are you going realistic or cartoony?
#
4
21-07-2005
, 08:12 PM
The lighting would really help the effect, but I definitely need to do some studying up on it and practice ligthing moods in order to acheive the image I want. I also plan to make most of the objects out of polygons and then either convert them to Sub-Ds or just smooth them, since it will be a still image. I am not sure if I will be able to texture the scene either, although i would like to. I would need to learn more about UVs to create a very realistic image, but I'll see what happens. I don't want to start texturing some things and not have evrything textured, so I'll just stick with lighting right now.
I wanted to try and keep the scene simple, yet effective becuase I have a lot of other projects I am also working on.
#
5
21-07-2005
, 08:22 PM
Registered User
Join Date: Jun 2004
Join Date: Jun 2004
Location: England
Posts: 19
Nice concept, im looking forward to seeing this one being created.
1 little coment about your scetch, I would maybe try for a more dramatic composition, possibly have the camera very low to the ground looking up so you can see the mouse's face in one corner and towering above the mouse shaking in fear is this huge elephant.
just an opinion and i know its early on in the design but ill be keeping my eye on this one.
good luck
#
6
21-07-2005
, 08:40 PM
The actual idea behind the scene is that the huge elephant is afraid of the tiny mouse, a myth about elephants and mice (I don't think it has any truth). So I'll be trying to make the elephant look terrified, while either having the mouse turned away from the elephant, not noticinig him, or just looking at him wondering why he is scared. It will be interesting to capture this mood with no animation.
Also, this is my first ever competition of any sort, but I find it fun to look at other people's projects and see the progress. So I will hopefully be entering more of these competitions.
#
7
22-07-2005
, 10:52 PM
edited for clarity
Last edited by baheno; 22-07-2005 at 11:29 PM.
#
8
27-07-2005
, 03:03 PM
A little work done
I also instanced the elephant leg and used a smooth proxy while working on the low polygon object to see what the final result will look like. I hope to have more done this week and especially next week. The mouse is also started, another poly object.
#
9
27-07-2005
, 03:06 PM
Lights and grass
#
10
28-07-2005
, 12:14 AM
texture updated
#
11
28-07-2005
, 12:16 AM
another updated render test
#
12
28-07-2005
, 12:25 AM
Wireframe of the modeling
#
13
28-07-2005
, 11:19 PM
Beginning the Elephant Head
#
14
28-07-2005
, 11:22 PM
The rock testure
#
15
28-07-2005
, 11:56 PM
Posting Rules Forum Rules
Similar Threads
problems with displacement and normal maps
by mickhah in forum Maya Basics & Newbie Lounge replies 4 on 23-12-2013
blending 2 normal maps to
by Sil-Valeor in forum Maya Basics & Newbie Lounge replies 0 on 26-12-2008
Normal Map mystery
by Velusion in forum Maya Materials & Textures replies 4 on 14-09-2006
July/August - Normal - PapalatiStudios
by papalatistudios in forum Previous Challenges (Archives) replies 102 on 27-08-2006
July/August Challenge Final NORMAL Entries!
by mtmckinley in forum Previous Challenges (Archives) replies 15 on 01-09-2005
Topics
Free Courses
Full Courses
VFX News
How computer animation was used 30 years ago to make a Roger Rabbit short
On 2022-07-18 14:30:13
Sneak peek at Houdini 19.5
On 2022-07-18 14:17:59
VFX Breakdown The Man Who Fell To Earth
On 2022-07-15 13:14:36
Resident Evil - Teaser Trailer
On 2022-05-13 13:52:25
New cloud modeling nodes for Bifrost
On 2022-05-02 20:24:13
MPC Showreel 2022
On 2022-04-13 16:02:13


