Introduction to Maya - Rendering in Arnold
This course will look at the fundamentals of rendering in Arnold. We'll go through the different light types available, cameras, shaders, Arnold's render settings and finally how to split an image into render passes (AOV's), before we then reassemble it i
#
1
03-09-2013
, 11:14 PM
Registered User
Join Date: Oct 2010
Join Date: Oct 2010
Posts: 233
UV sets? Shading groups? ??
Not sure if this is the right place for this question, but you folks here are usually pretty helpful...
I've been trying out autodesk's ReCap, and so far have been pretty pleased with the results. But now I've hit the inevitable snag -
The fbx or obj always has a strange setup regarding the texture and material; truth is I've not much knowledge of UV's, sets, shading groups or similar. My intention was to clear up the stray geometry, import to ZBrush and convert the texture to polypaint, do some extra sculpting and painting, retopologize in 3D Coat, UV the new mesh then project the polypaint to the new mesh/uv's.
Thing is I'm stuck in the gates as I don't know how to tackle this strange (to me) uv setup in maya in the first instance. I've no idea how to combine or keep the texture intact to make it robust enough to get into ZBrush (I can only apply one texture at a time in ZB) or to transfer it to new uv's or material. I've attached a screenshot of the node graph of the mesh and UV's as I really don't know where to start explaining the setup, hopefully someone can give me a heads up here.
thanks
j
#
2
04-09-2013
, 01:01 AM
Lifetime Member
Join Date: Feb 2013
Join Date: Feb 2013
Location: Down Under
Posts: 245
I'm no expert myself (just studying Maya in my spare time) but I have a few queries/suggestions.
I'm not really sure how ReCap works but I get the idea is that it converts 2D images to 3D models, correct? And now you want to texture your model which means that the UVs need laying out in Maya. If this is the case:
Firstly, it would be handy if you could also upload a pic of the model that you're working on so that we can get an understanding of what the UVs are suppose to be.
Secondly, you'll need to UV map the various parts of the mesh using the different mapping options that Maya has to offer, planar, cylindrical, spherical or automatic.
Using these you begin to lay out the UVs so that they make a bit of sense/reflect what your model looks like. The main aim is to make sure that none of them are overly stretched as this will affect the textures.
Below is an image of UVs that I laid out following the Surfing Alien tutorial on this site. When I first started they were just a mess of lines overlapping each other but working my way through each part I made it look like this.
PS. The Help>Maya Help is really useful to get an overview of things too.
Cheers, the Yeti.
#
3
04-09-2013
, 07:42 AM
Registered User
Join Date: Oct 2010
Join Date: Oct 2010
Posts: 233
thanks. But I've not explained myself properly it seems.
I understand how to lay out UV's, the various mapping options etc. I also know how to create new topology for a mesh and how to transfer the texture from one to the other.
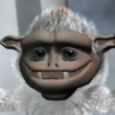
you're correct - it's does create a 3D mesh from photos, it also used the photos to texture the mesh. But when it first comes to you, the textures and uv's are all over the place. There's nothing you can do about it, that's just the way the photos are interpreted. This particular mesh is false teeth, but the recap system has to map the whole surroundings too, to properly construct the scene, so you get a load of extraneous geometry which you need to pare down. the mesh is heavily tessellated too.
I'd be ok if there was just one set of uv's for the mesh, but there's two and I don't understand how to deal with them.
hopefully this makes a little more sense
#
4
04-09-2013
, 09:03 AM
Lifetime Member
Join Date: Feb 2013
Join Date: Feb 2013
Location: Down Under
Posts: 245
Ok, I understand a little better now (enough to know it's a bit out of my depth). I would probably be trying to stitch a few of the UVs together to try and make some sense but unfortunately I really don't know what's best as I've never played with ReCap.
Best of luck getting a solution, mate.
Cheers, the Yeti.
#
5
04-09-2013
, 11:02 AM
Registered User
Join Date: Oct 2010
Join Date: Oct 2010
Posts: 233
Bizarrely, I was looking over some of the older models I'd generated using the service and I'd managed to re-uv one of them! I just can't remember how I did it :-/ I didn't have this number of problems. Perhaps I depends on the quality of the mesh that's generated.
I'll keep looking. Thanks
#
6
05-09-2013
, 09:26 AM
Registered User
Join Date: Oct 2010
Join Date: Oct 2010
Posts: 233
useful to know if you ever try ReCap!
#
7
05-09-2013
, 10:22 AM
Lifetime Member
Join Date: Feb 2013
Join Date: Feb 2013
Location: Down Under
Posts: 245
Cheers, the Yeti.
Posting Rules Forum Rules
Similar Threads
Textures not linking to tutorial maya....
by dan003 in forum Maya Basics & Newbie Lounge replies 2 on 07-03-2015
Uv sets help.
by luk34llen in forum Maya Materials & Textures replies 6 on 01-06-2012
Cleaning up Uv Sets and creating New UV sets "Error While Parsing Arguments"
by ryuhayabusa13 in forum Maya Basics & Newbie Lounge replies 0 on 20-12-2009
Translfer UV Sets
by edoplaza in forum Maya Basics & Newbie Lounge replies 14 on 29-08-2005
Copying 2 UV sets into 1
by mayaMan1982 in forum Maya Basics & Newbie Lounge replies 5 on 05-04-2005
Topics


Free Courses


Full Courses


VFX News
How computer animation was used 30 years ago to make a Roger Rabbit short
On 2022-07-18 14:30:13
Sneak peek at Houdini 19.5
On 2022-07-18 14:17:59
VFX Breakdown The Man Who Fell To Earth
On 2022-07-15 13:14:36
Resident Evil - Teaser Trailer
On 2022-05-13 13:52:25
New cloud modeling nodes for Bifrost
On 2022-05-02 20:24:13
MPC Showreel 2022
On 2022-04-13 16:02:13