Digital humans the art of the digital double
Ever wanted to know how digital doubles are created in the movie industry? This course will give you an insight into how it's done.
#
1
10-11-2010
, 09:44 PM
Registered User
Join Date: May 2009
Join Date: May 2009
Posts: 26
Reshaping a sphere with a bump map
https://read.pudn.com/downloads83/sou.../earthbump.png
Last edited by fox95871; 11-11-2010 at 12:36 AM.
#
2
10-11-2010
, 11:49 PM
#
3
11-11-2010
, 12:06 AM
To actually display the surface select displacement from the bump map drop down menu. I have not played with displacement much. I am not sure but you make have to increase the mesh density of the initial sphere. Experiment and see what you get. Report back.
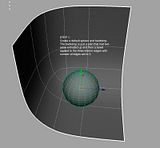
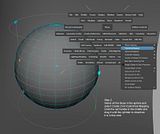
Remember to apply the lambert shader to the sphere. I left that step out. I saved the wrong image for step 4b and I am to lazy to reload. All it has is a line pointing to the bump map folder row and says enter the path to the bump map image.
Good luck. I tossed this together very quickly I hope it is useful.
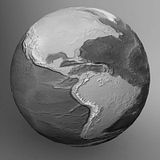
Here is what is produced:
Here are the steps:


"If I have seen further it is by standing on the shoulders of giants." Sir Isaac Newton, 1675
Last edited by ctbram; 11-11-2010 at 12:20 AM.
#
4
11-11-2010
, 12:21 AM
Registered User
Join Date: May 2009
Join Date: May 2009
Posts: 26
https://earthobservatory.nasa.gov/Fea....5400x2700.jpg
Last edited by fox95871; 11-11-2010 at 12:58 AM.
#
5
11-11-2010
, 03:09 AM
The bump map channel has three modes bump (give illusion of depth), displacement (actually displaced the geometry), and normal (once again just give illusion of depth but is based on actual geometry instead of a grey scale image).
From the height map it appears to have far less data then the other map. But the process is exactly the same. Just chose the displacement option from the bump drop down menu.
As I said I don't have any experience with displacement so I don't know if you have to already have the necessary mesh density or not. You will have to experiment with it. All the stuff I did is exactly what you have to do except select displacement instead of bump.
"If I have seen further it is by standing on the shoulders of giants." Sir Isaac Newton, 1675
#
6
11-11-2010
, 10:56 AM
One option of displacement is in sculpt geometry tool under Polygon menu set.
Under attribute maps import the file name. Keep Import value as luminance. You need to play with the max displacement value. start with 200. Operation will be pull.
Mahesh
#
7
11-11-2010
, 04:50 PM
Registered User
Join Date: May 2009
Join Date: May 2009
Posts: 26
Last edited by fox95871; 11-11-2010 at 06:40 PM.
#
8
14-11-2010
, 07:30 PM
Registered User
Join Date: May 2009
Join Date: May 2009
Posts: 26
I figured out how to do it with the YouTube video above, but I used an image file instead of the crater method he used. I still need to know how to set what the lowest and highest points will be though. In the one I made, the effect was too slight. I also ended up with a mesh that was too dense, and when I tried to reduce it, it ended up looking like a morningstar. Please help if you can.
Last edited by fox95871; 14-11-2010 at 07:40 PM.
Posting Rules Forum Rules
Similar Threads
Help: Applying Bump Map to Select Faces
by Archaismic in forum Maya Materials & Textures replies 5 on 05-01-2013
Controling bump map colors
by lauris47 in forum Lighting & Rendering replies 7 on 30-12-2012
more than one bump map
by ben hobden in forum Maya Materials & Textures replies 1 on 12-10-2008
Bump Map problem
by Jaroehl in forum Maya Basics & Newbie Lounge replies 2 on 20-02-2006
bump map texturing problems
by strytus in forum Maya Materials & Textures replies 19 on 05-06-2003
Topics
Free Courses
Full Courses
VFX News
How computer animation was used 30 years ago to make a Roger Rabbit short
On 2022-07-18 14:30:13
Sneak peek at Houdini 19.5
On 2022-07-18 14:17:59
VFX Breakdown The Man Who Fell To Earth
On 2022-07-15 13:14:36
Resident Evil - Teaser Trailer
On 2022-05-13 13:52:25
New cloud modeling nodes for Bifrost
On 2022-05-02 20:24:13
MPC Showreel 2022
On 2022-04-13 16:02:13


