Beer glass scene creation
This course contains a little bit of everything with modeling, UVing, texturing and dynamics in Maya, as well as compositing multilayered EXR's in Photoshop.
# 1 21-01-2007 , 03:23 PM
ZeroAlarm's Avatar
Subscriber
Join Date: Jan 2007
Posts: 86

Wipeout Feisar

Ok, I'm giving the mech tutorial a break because it's annoying me at the moment.
I've found a nice little tutorial on 3d-palace on modelling a Feisar racer from Wipeout - it's done in XSI but I want to try it in Maya.
I've got about 2 minutes into the tutorial and hit a problem though, and no one from the 3d-place forums are offering help.
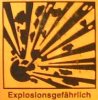
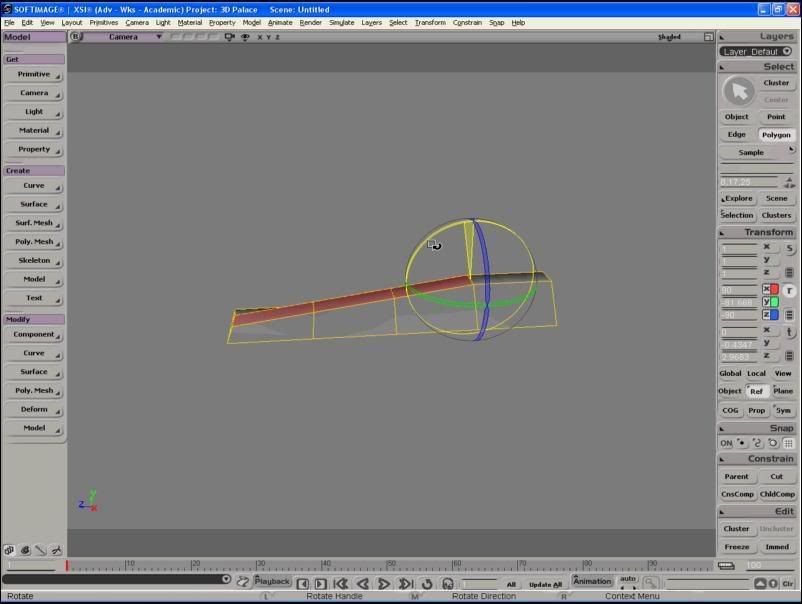
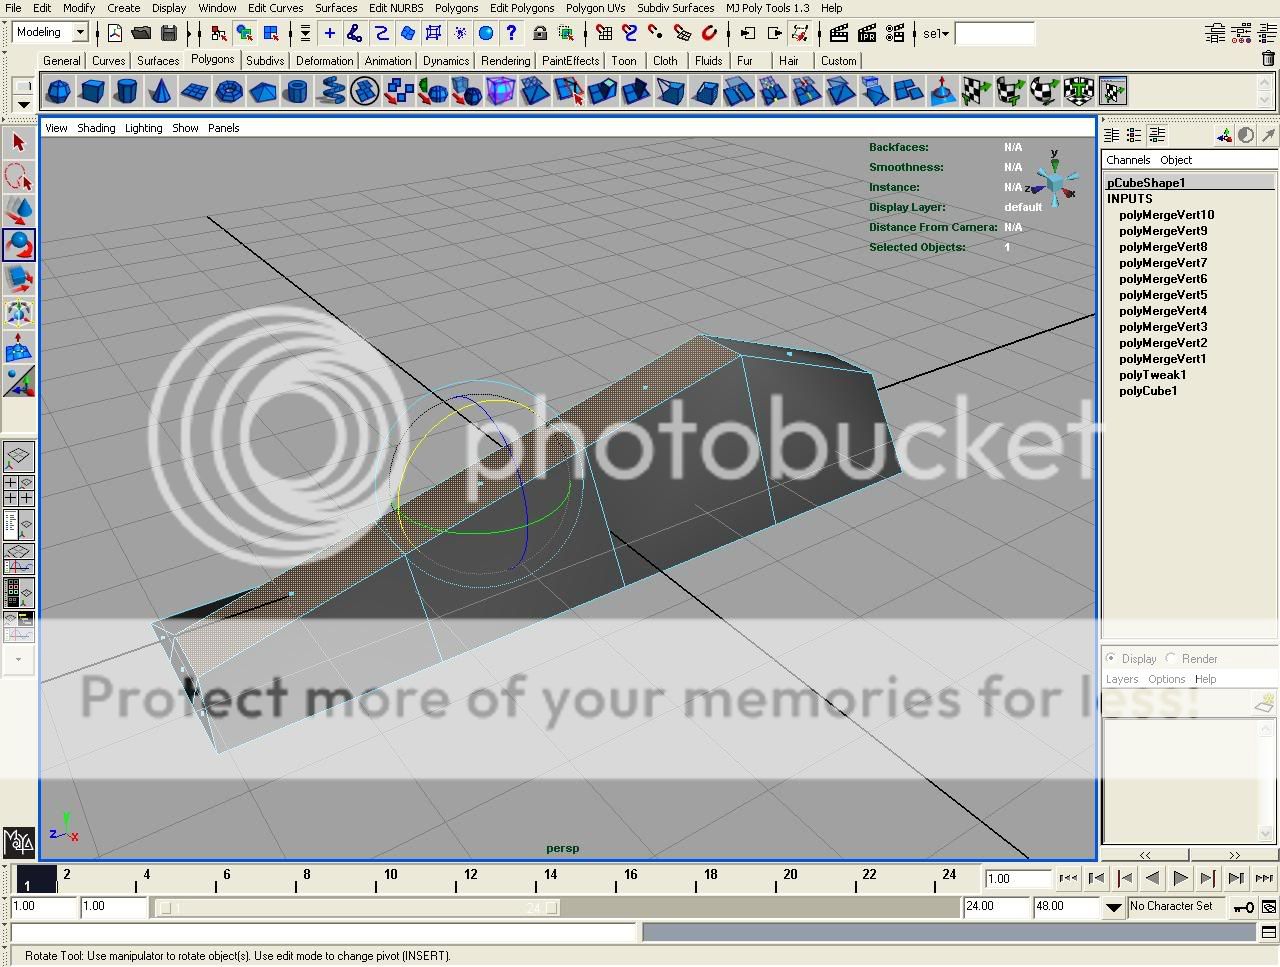
The guy chooses 3 faces and then an edge and rotates the faces down, using the edge as the rotation reference. Is there any way to do this in Maya? I have an image below so you can get the idea.
Thanks if anyone knows!
user added image

# 2 21-01-2007 , 03:43 PM
Subscriber
Join Date: Apr 2004
Location: Bonny Scotland!
Posts: 116
- Select the faces

- Press "insert" on the keyboard

- Move the pivot point to the desired location (for example snap it to a verted along the edge you want to use as the pivot.

- Press insert again


Note: when manipulating the pivot clicking the little blue circle that is on a stem from the center will pin the pivot for the scale, rotate and transform tools. Clicking it a second time will un pin the pivot point. (Yellow with a circle inside is Pinned, Blue with no circle inside is unpinned).

Hope this helps

J.

# 3 21-01-2007 , 03:52 PM
ZeroAlarm's Avatar
Subscriber
Join Date: Jan 2007
Posts: 86
This is how far I've got. As you can see, with the 3 faces selected, the back face goes up. There must be some way to use the edge as a pivot, but I can't figure it out
user added image

# 4 21-01-2007 , 04:07 PM
99GsTurbo's Avatar
Subscriber
Join Date: Oct 2006
Location: Boston
Posts: 566
jhaydock answered it correct. If you look at your image, your pivot point is in the center. that will cause 1 side to go up and 1 side to go down. do what jhaydock said

hit insert to pull up your piviot point. Then what i usually do it select the command snap to edge and then move the piviot point until it snaps the the back end of that face u dont want to move up and then hit insert again to get out the pivot menu. i have way grouped together but Jhaydock said the exact same thing so if you follow what he said, you will be fine


Last edited by 99GsTurbo; 21-01-2007 at 04:13 PM.
# 5 21-01-2007 , 04:08 PM
ZeroAlarm's Avatar
Subscriber
Join Date: Jan 2007
Posts: 86

Originally posted by jhaydock
- Select the faces

- Press "insert" on the keyboard

- Move the pivot point to the desired location (for example snap it to a verted along the edge you want to use as the pivot.

- Press insert again


Note: when manipulating the pivot clicking the little blue circle that is on a stem from the center will pin the pivot for the scale, rotate and transform tools. Clicking it a second time will un pin the pivot point. (Yellow with a circle inside is Pinned, Blue with no circle inside is unpinned).

Hope this helps

J.

Sweet! Cheers J, I didn't see this before I posed the second time.
It works perfectly user added image Thanks a lot!

# 6 21-01-2007 , 04:17 PM
enhzflep's Avatar
Subscriber
Join Date: Oct 2006
Location: Melbourne
Posts: 313
Seems everyone beat me to the punch. I had a reply all typed up, checked before I posted, and woa!!

So I've just got this to add. this method is the best way of doing it if you don't want/need the 3 edges at the front to be flat.

If you want a constant angle on the sloping part, AND you want the 3 edges to be flat, try this way.

Attached Thumbnails
# 7 21-01-2007 , 04:34 PM
ZeroAlarm's Avatar
Subscriber
Join Date: Jan 2007
Posts: 86
Turbo: cheers for the explanation user added image
Flep: sorry mate! Thanks though. So with your method, I start with a plane and do it?

Well I've done a bit more, including adding some edges where the cockpit will be. I want to cut this guy in half and duplicate it on the other side, but I also want it to so that any changes I make to the original side will be mirrored on the duplicate. Does anyone know how to do this? Thanks!

user added image

# 8 21-01-2007 , 04:53 PM
enhzflep's Avatar
Subscriber
Join Date: Oct 2006
Location: Melbourne
Posts: 313
ha ha, no worries, it's not your fault I type so slow.

Yeah, just started with a poly plane, 3 divisions wide, 1 division long.


As for working on one half, and having a mirror of it,
I just use Smooth Poly Proxy, reset all options, set the mirror direction appropriate for the axis it sits along, check Keep Hard Edges and hit apply. This will creat an exact mirrored copy of what you're doing, AS WELL as a higher res version that is both halves stuck together. Dlete the low poly mirror, select the higher poly part and move it out of the way so you can continue to work on the low poly version.

Though, something I've seen Zak from 3Dbuzz do in Modelling on the fly makes me think that there's a much easier way of doing this, without the smoothing or th extra geometry.
S.

# 9 21-01-2007 , 05:06 PM
ZeroAlarm's Avatar
Subscriber
Join Date: Jan 2007
Posts: 86

Originally posted by enhzflep
ha ha, no worries, it's not your fault I type so slow.

Yeah, just started with a poly plane, 3 divisions wide, 1 division long.


As for working on one half, and having a mirror of it,
I just use Smooth Poly Proxy, reset all options, set the mirror direction appropriate for the axis it sits along, check Keep Hard Edges and hit apply. This will creat an exact mirrored copy of what you're doing, AS WELL as a higher res version that is both halves stuck together. Dlete the low poly mirror, select the higher poly part and move it out of the way so you can continue to work on the low poly version.

Though, something I've seen Zak from 3Dbuzz do in Modelling on the fly makes me think that there's a much easier way of doing this, without the smoothing or th extra geometry.
S.

Ah cool! Thanks very much! user added image
Cheers for all the help guys!

# 10 21-01-2007 , 07:56 PM
petrol's Avatar
Subscriber
Join Date: Mar 2005
Location: London UK
Posts: 351
Funny i've thought about doing a wipeout craft recently... gotta love the style of that game. Feisar are the British section too arent they?

# 11 22-01-2007 , 02:58 PM
ZeroAlarm's Avatar
Subscriber
Join Date: Jan 2007
Posts: 86

Originally posted by petrol
Funny i've thought about doing a wipeout craft recently... gotta love the style of that game. Feisar are the British section too arent they?

It would be good to give it a go! I'm having fun even though there is a lot of translation to do from XSI. I guess if I knew more about Maya I wouldn't have to do that, but hey. I'd be happy to lend you any help from what I've learnt so far.

I think Wipeout is my favourite game style-wise. It has the strongest sense of style out of most games IMO, which, with the awesome gameplay, makes it fantastic user added image
I'm not sure if Feisar are the British team. I think Auricom could be because they have the colours red, white and blue, but then again that could mean they are American

# 12 22-01-2007 , 03:07 PM
ZeroAlarm's Avatar
Subscriber
Join Date: Jan 2007
Posts: 86
Ok guys, I've gone back over and done what Flep suggested, and I've extruded some edges to create the shape of the craft. I'm just left with this hole here that I don't know how to fill. If anyone could tell me I'd be really grateful.
user added image

Also, I have 2 edges which should be one but are not. Will this cause any problems and does anyone know how to join them? I've tried the merge edge tool but it doesn't seem to work, or a I can't seem to work it, lol.
user added image

And thanks for putting up with my noobness! user added image


Last edited by ZeroAlarm; 22-01-2007 at 03:19 PM.
# 13 22-01-2007 , 04:31 PM
enhzflep's Avatar
Subscriber
Join Date: Oct 2006
Location: Melbourne
Posts: 313
Well, in the first image, you can just select the 8 edges at the back, then do EditPolygons->FillHole. That should take care of that part.

As for the second image, you really need to cut the faces of the pannel underneath, so that you've got a vert there to line up with the one in the air. I spose you could just spin it over so you're looking at it from the bottom, then use the SplitPolygonTool to make a cut accross the bottom. Drag the vert concerned down to meet it's new friend then merge them, same as the one on the right of your image a the same spot.

# 14 22-01-2007 , 08:11 PM
dave_baer's Avatar
Moderator
Join Date: Sep 2002
Location: Plantation, Florida
Posts: 1,568
Are you totally incapable of creating smaller screen shots, ZeroAlarm? Obviously, you didn't read the STICKY thread before posting, eh?

*******
Happy now, enhzflep? :bow:


Dave Baer
Professor of Digital Arts
Digital Media Arts College
Boca Raton, Florida
dbaer@dmac.edu
# 15 23-01-2007 , 07:27 AM
ZeroAlarm's Avatar
Subscriber
Join Date: Jan 2007
Posts: 86
flep: has anyone ever told you that you're a genius? :p Thanks LOADS for that; I would've been totally stuck otherwise

Dave: Sorry about that! I didn't want to make it any smaller otherwise the highlighted edges wouldn't have shown up. I'll keep it at a smaller size for the rest of them though. Thanks for the warning

Posting Rules Forum Rules
You may not post new threads | You may not post replies | You may not post attachments | You may not edit your posts | BB code is On | Smilies are On | [IMG] code is On | HTML code is Off

Similar Threads