Beer glass scene creation
This course contains a little bit of everything with modeling, UVing, texturing and dynamics in Maya, as well as compositing multilayered EXR's in Photoshop.
# 1 29-09-2010 , 03:09 PM
Registered User
Join Date: Jan 2006
Location: bexleyheath
Posts: 2

i need help :(

Hey guys my names Sam and im new to the community and sort of new to MAYA ive used in on and off for the last few years my modelling isnt the greatest but im still learning.

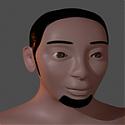
My main problem area is texting and getting something to look the real deal so at the moment im doing a project in university and we have to use maya and i want mine to look gr8 ive modelled a few bits to go in the model just need advice on how i can make the items look real so any adivce, tips or good links would be a real help as i want to do 3d modelling as a career in the future

My project is compact minimal living btw.

user added image

user added image

user added image

user added image

user added image


boyze
# 2 29-09-2010 , 08:11 PM
daverave's Avatar
The thin red line
Join Date: Aug 2009
Location: England
Posts: 4,472
Hi boyze
There are free tutorial on this site, what you need to do is get as much info on UVs and lighting...........dave


Avatar Challenge Winner 2010
# 3 29-09-2010 , 08:47 PM
murambi's Avatar
Head of 3d Admedia
Join Date: May 2007
Location: nairobi , ken-ya
Posts: 1,340
the advice i would give is to check into lighting

there are two ways to do this either by using final gather and/without global illuminitaion the only problem is that it takes ages to render

the other way is to use multiple lights to try and get as realistic an image as possible much more difficult but very quick to render

# 4 29-09-2010 , 11:43 PM
Nilla's Avatar
Administrator
Join Date: Jun 2009
Location: Prague
Posts: 827
Hi Sam,

To get very good results with the scenes you have is quite difficult as you have multiple objects and the lighting of the room they're in to worry about in addition to this. I personallly think it's a bit much to take on for someone who's new to this, and I don't understand why your university would give you such a complicated project with no additional information, because I've been doing lighting and shading in Maya for two years and I struggle to get something like this to look good. But if you have a bit of time to complete this it should be possible to do, I'm working with scenes similar to yours at the moment for our more complicated lighting tutorials so if you want I can help you along the way because I love this topic.

You need to start by breaking things down and working on the individual objects, also you need to learn the lighting and shading separately and when you have the basics for both you can start to bring them together and work on your scene as a whole.

I'm gonna start by going over the shading, and first of all there's nothing in your scenes that will require UV layout so don't waste your time on this because it takes ages and it's not the most interesting thing either. You want to focus on using the shaders Blinn, Phong, Phong E, Anisotropic and Lambert to create things like plastic, metals, porcelain and wood. By connecting in Maya's procedural 3d textures to different attributes of these shaders you can break things up and get variations like scratches on a plate, these textures work independent of UV's on geometry and should be used for basic hard surface objects. I've just finished a tutorial on this, two of the parts will be in the free section tomorrow. One is an introduction to lighting and shading that goes over the very basics, the second one shows you how to create porcelain and plastic materials so watch these to start somewhere.

I create materials in isolation with a lighting dome because this is a quick way to get some good overall illumination and see what things look like, there's a tutorial in the free section on how to set up a basic dome, remember that almost all materials have some sort of specular highlight even a rough surface like rubber and these will not show with indirect illumination only so you will need a spotlight to boost these kind of highlights.

When it comes to creating polished metals we were just talking about this in a different thread https://srv01.simply3dworld.com/showt...hreadid=34446, if you read what is in there it should give you the fundamentals to make any kind of metal you might need along the way.

Glass is easy to make with mental rays dielectric material at default settings, as with metals keep in mind that glass surfaces are highly reflective so the quality of something like this comes down to what's in your scene to reflect. Getting really good looking glass is very difficult.

For wood, I uploaded two shaders to the resources section of the site a few weeks back you can get them here https://www.simply3dworld.com/downloa...eid=5&catid=16 and import them into your own scenes. If you look at the networks for these it will give you a good idea of how to connect things together in terms of different materials. Dave also made a burnished copper which is really nice. You can find a lot of additional shaders on highend3d, but they are of variable quality and a lot of them have very complicated shading networks with utility nodes that you'd need to understand.

When you have some general base materials to work with you can start to assign these to the objects in your scene, and at this point you will have to tweak them to work with the lighting set up you have. This is the point where things get difficult because to work with so many different materials and getting them all to look good will require a lot of knowledge on lighting in terms of that a light set up that works well with some materials might not work so well with others. This is the reason for why when you see tutorials on environment lighting they'll use a room with very few objects in it, I'm working on a tutorial right now covering lighting for different times of the day and there's almost nothing in my room.

Indirect illumination with final gather, gi and physical sky and sun are the best methods for lighting interiors and exteriors and the way to go when you have different materials like this, but all these things are very complicated topics. Because you need to do a lot of test rendering when you light complete scenes like this to get a good end result it is really important to understand the technical aspect of how these features work as it will take a long time to render with them. If you know how to tweak your settings this can be the difference between a render time of five minutes as opposed to one hour, and if you have to make 50 test renders during the lighting and shading process to get to the result you want this will make a huge difference. A quick and dirty way to get some good overall illumination into a room would be to scale up a volume light and turn on final gather to get the indirect illumination from this. If you scale it right you'll also get darkening that will naturally occur in the corners of a room.


For mental ray itself as a renderer Sybex has a good book on the more technical side that you could take a look at. David's also doing some tutorials on this for the site, they'll be done in a few weeks and he's put lots of time into them so they're were high quality tutorials in terms of content. If he can get the recording to come out well without sounding like a muppet is a different storyuser added image

If you want you can send us your scenes nilla@simply3dworld.com and me and David can have a crack at it and probably help you get started on things.

Best of luck,
Nilla

# 5 30-09-2010 , 03:05 PM
Registered User
Join Date: Jan 2006
Location: bexleyheath
Posts: 2
thanks a lot for the feedback so quick guys.

Was a good read Miss_Nova and i will follow a lot of your advice. I dont think my tutors want anything highly detailed and seeing as this project is onli five weeks long ill just have to keep the materials to real basic. Thanks to some of your advice ill at least be able to make the objects have a basic material that shows what it is so im truely greatfull for the quick response i didnt realise how complicated its going to be.


boyze
# 6 30-09-2010 , 04:07 PM
Jay's Avatar
Lead Modeler - Framestore
Join Date: Feb 2003
Location: UK
Posts: 6,287
just want to add to this.

With regard to no having uvs on an object: this is fine if you are using procedural texures out of maya. But by having good uvs on a model will always be better. It will aid in achieving better reflections if the surface requires it, especially since objects are puhed and pulled in the modelling process destroying the original primitives uv. Just something worth bearing in mind

cheers Jay

# 7 30-09-2010 , 06:29 PM
Nilla's Avatar
Administrator
Join Date: Jun 2009
Location: Prague
Posts: 827
It's very true, there's no way around UV mapping in a lot of the time so it is an important point to make and something you need to learn as well with time. Even in the case of Maya's procedural textures it's only with the 3d procedurals you can get away from this. My take on it is simply that in terms of something like an interior, you're a lot better of using shaders as you'll be able to generate good materials quickly and with things like the mental ray architectural materials and image based lighting you can get some great results.

Another strenght of procedurals over bitmapped textures is that they will not pixelate when you zoom in on them and if you're going for a close up photorealistic shot this is of great importance. If you're making your own color map in Photoshop, you can of course set the resolution really high to reduce this effect, I'm painting a high res map for the spitfire at the moment. The problem with that I've noticed is that when you're rendering with these kind of high res maps and you have something like physical sky and sun in addition to this your render times start to run incredibly high when it takes a lot more processing power to calculate one of these high res maps. As procedurals are calculated differently than bitmaps, you also have the advantage that you'll get random patterns and avoid repetitions in your textures whithout having to start shuffling UV's which can be a bit tricky to get right.

In the end of the day, you will need to map your textures to a surface material, and even if you have a great color map it won't come out nice unless you understand how to work with the material it's actually on as this should be in control of specular highlights and reflections that will appear on the surface which is what will determine the level of realism in terms of your lighting. For this reason, I think the best route to take is to learn to understand materials first, then the textures themselves.

There is very little focus on surface materials in a lot of tutorials you find online which is a shame because they are crucial to get any kind of good lighting to work. I spend a lot of time looking at gallery images and demo reels and I've noticed that a lot of people only use the material as a route to get their bitmaps on to a model, and then completely ignore the rest. I think this happens because you start in the UV and texturing end of things, and when you put a color and bump map on a grey Blinn and this completely changes what it looks like the material itself doesn't seem to be that important anymore. I've also seen people lay out all the UV's for huge metallic surfaces, only to texture paint it in a uniform color and apply that as a color map, when you would have had a better result done in two seconds by giving it a metallic paint shader.

Another thing with the procedurals is that the names are quite misleading, for example you might put a water texture on a plane render it and find that this doesn't look like water at all and based on this assume that they're just there as basic default textures but that you should always take the time to make your own bitmaps if you can. I've heard from people in the past. The thing with these textures are that a lot of time you use them for pretty much the opposite of what they say, in the case of water I use this one to create sand dune patters, which it is a lot better for than making actual water.

That said, you can't use shaders and procedurals for absolutely everything so texture painting and UV's are important as well. I just wouldn't start in this end, especially not with something like an interior scene, but it comes down to who you are and what you enjoy.

@Jay: In your case being a great modeler I can see why UV's are not that bad, but for someone like me who detests modeling the UV mapping is a bit like going through the whole painful process againuser added image Dave told me about your lighting tutorial btw, it sounds interesting so I look forward to watching it. He's here in the background laughing saying that the only reason for why I'm writing these marathon forum posts is because I'm trying to get myself out of recording the final parts of my video.

@boyze: I looked at the scenes again and you should be fine just learning how to use basic light types and materials, and actually not need to light it up as a whole room. You can just point spots at it with 3 point lighting. We have a tutorial on this in the free section. I also made a basic lighting tutorial a few months back which you can find in the lighting section on the site, it's cheaper than most other things out there and it would teach you everything you'd need to know in terms of those scenes to get some quick results. Or read the Maya help files, they have a lot of basics covered as well, but the language is technical, so it can be a bit of a mouthfull. Just a tip for the future if you're ever lighting up a room remember that you need all four walls and a roof as well, it's easy to delete one wall and not think about this.

# 8 30-09-2010 , 08:57 PM
Jay's Avatar
Lead Modeler - Framestore
Join Date: Feb 2003
Location: UK
Posts: 6,287
Heya Nila

LOL get on those tutes user added image

Everything you have said is absolutely right, I just had to add my 10 cents.

Its funny you mentioned the strength of Procedurals, yesterday we had a rush job on for a photobacking for the film Im on. I built the 3d set extension in the morning, myself and a colleague then textured with procedurals in the afternoon in the space of around 2 hours, it was then lit and rendered with all passes at an impressive 10800 pixels (with the new technique), comped and out of the door by midnight.

Today we had some minor corrections on it but again the same approach was used and also for a new extension, which I did entirely myself using the same method. Im happily now relaxing at home while the other guys are just finsihing the comp at work.

My point being apart from impressing with the size of the render is that the procedural approach can also be very fast and a life saver. We were using 2d ramps with them to get a variation in the textures, had we approached this the normal route of UV mapping I would still be there now creating them with the textures - and would be very tired!!


Once Im done on this project I'll gladly show you the fg approach using mental ray but not touching fg or GI. I think will open a few eyes for sure. It certainly made me think about my rendering. It is very fast!!!

cheers
Jay

Posting Rules Forum Rules
You may not post new threads | You may not post replies | You may not post attachments | You may not edit your posts | BB code is On | Smilies are On | [IMG] code is On | HTML code is Off