Maya for 3D Printing - Rapid Prototyping
In this course we're going to look at something a little different, creating technically accurate 3D printed parts.
#
76
16-06-2004
, 12:49 AM

Registered User
Join Date: Oct 2002
Join Date: Oct 2002
Location: India
Posts: 127
Creativity is allowing yourself to make mistakes. Art is knowing which ones to keep.
#
77
16-06-2004
, 12:31 PM

Subscriber
Join Date: May 2004
Join Date: May 2004
Location: Denmark
Posts: 816

Liter is French for 'Gimme some ****ing cola before I break vous ****ing lips!"
#
78
16-06-2004
, 12:56 PM

The Maya Mountain
Join Date: Aug 2002
Join Date: Aug 2002
Location: Seattle, WA
Posts: 8,245
#
79
16-06-2004
, 01:23 PM
Subscriber
Join Date: May 2004
Join Date: May 2004
Posts: 233
Good luck!
#
80
16-06-2004
, 02:10 PM
Subscriber
Join Date: May 2004
Join Date: May 2004
Location: Denmark
Posts: 816
Definely! That would look SOO sweet!Originally posted by Mantat
The tatoo idea is good but how can you tatoo something coverred with fur? I think you should change the texture of the tatoo to make them burn mark. It would also help him to look meaner.
#
81
16-06-2004
, 04:11 PM
Subscriber
Join Date: Dec 2002
Join Date: Dec 2002
Location: Sunderland, England
Posts: 581
mayaguy - see above post to yours
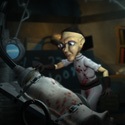
the horn texturing ain't really started yet - it will def be darker - cheersblomkaal - yeah these comps are fun and they definitely spur you on to finish (not that I always finish tho
)Mike - I get where you are coming from will have a go at the texturing tonight - see what I come up with.
Mantat - yeah I was trying to acheive that sort of effect - there is asmall amount of bump which should create an indentation effect - like a branding/burn but not sure about the actual colouring of a burn/brand - will investigate further
once again ta for all comments
cheers
Rich
#
82
16-06-2004
, 06:29 PM
Subscriber
Join Date: Dec 2002
Join Date: Dec 2002
Location: Sunderland, England
Posts: 581
commentas/crits welcome
cheers
Rich
#
83
16-06-2004
, 06:40 PM
The Maya Mountain
Join Date: Aug 2002
Join Date: Aug 2002
Location: Seattle, WA
Posts: 8,245
https://www.getanimals.com/ccwild/steer.jpg
https://www.satcure.co.uk/sticks/images/Cow_horns.jpg
You might also want to experiment with the ridge direction.... some of these pics seem to have the ridges running along the horn's length rather than around the width.
#
84
16-06-2004
, 09:32 PM
Subscriber
Join Date: Dec 2002
Join Date: Dec 2002
Location: Sunderland, England
Posts: 581
cheers
Rich
#
85
16-06-2004
, 11:44 PM
Subscriber
Join Date: Dec 2002
Join Date: Dec 2002
Location: Sunderland, England
Posts: 581
comments/crits welcome
cheers
Rich
#
86
17-06-2004
, 02:14 AM
Subscriber
Join Date: Mar 2004
Join Date: Mar 2004
Posts: 161
#
87
17-06-2004
, 07:12 AM
Subscriber
Join Date: May 2004
Join Date: May 2004
Location: That place with all those people
Posts: 1,041
Watch Space Wars at www.3dden.co.uk now!
__________________________
My pin number is XXXX
#
88
17-06-2004
, 04:08 PM

Registered User
Join Date: Jul 2003
Join Date: Jul 2003
Location: Germany
Posts: 457
thx bye
#
89
17-06-2004
, 06:16 PM
Subscriber
Join Date: May 2004
Join Date: May 2004
Posts: 233
Now about the new wristband: its great! Are you going to make a breastplate in the same material or go for leather armor?
Keep going, its going to look great!
#
90
17-06-2004
, 07:59 PM
Subscriber
Join Date: Dec 2002
Join Date: Dec 2002
Location: Sunderland, England
Posts: 581
rubberchicken - did you mean dark closest to the head?
Dragonhawk - the texture on the horns is basically done in photoshop - a gradient from dark brown to light brown, then a couple of filters added to get the ridged look - one being the texturizer (canvas) - my texturing skills
if I have any it's thanks to this place - download the texturing tutorials - you will learn lots from them!! Mantat - do you mean the dark little dark depressions? it's just a bump so I can change that easily enough - the dark texture - yeah I darkened it too much - it's easy enough to change as well so I will. Will be making a breastplate - probably a similar material - with leather around hopefully - cheers for you comments
cheers
Rich
Posting Rules Forum Rules
Similar Threads
June Challenge - Axel - Normal
by Axel in forum Previous Challenges (Archives) replies 7 on 25-06-2003
June Challenge - ereitz - normal
by ereitz in forum Previous Challenges (Archives) replies 29 on 19-06-2003
June challenge - cb8rwh - Normal
by cb8rwh in forum Previous Challenges (Archives) replies 1 on 07-06-2003
May Challenge - cb8rwh - Normal
by cb8rwh in forum Previous Challenges (Archives) replies 100 on 01-06-2003
April challenge - cb8rwh - normal
by cb8rwh in forum Previous Challenges (Archives) replies 49 on 27-04-2003
Topics

Free Courses


Full Courses


VFX News
How computer animation was used 30 years ago to make a Roger Rabbit short
On 2022-07-18 14:30:13
Sneak peek at Houdini 19.5
On 2022-07-18 14:17:59
VFX Breakdown The Man Who Fell To Earth
On 2022-07-15 13:14:36
Resident Evil - Teaser Trailer
On 2022-05-13 13:52:25
New cloud modeling nodes for Bifrost
On 2022-05-02 20:24:13
MPC Showreel 2022
On 2022-04-13 16:02:13