Complex UV Layout in Maya
Over the last couple of years UV layout in Maya has changed for the better. In this course we're going to be taking a look at some of those changes as we UV map an entire character
#
1
31-01-2005
, 11:32 PM
Subscriber
Join Date: Nov 2004
Join Date: Nov 2004
Location: In the middle of nowhere in VA
Posts: 749
Guitar Help
Last edited by alienscience; 31-01-2005 at 11:38 PM.
#
2
31-01-2005
, 11:35 PM
Subscriber
Join Date: Nov 2004
Join Date: Nov 2004
Location: In the middle of nowhere in VA
Posts: 749
#
3
31-01-2005
, 11:36 PM
Subscriber
Join Date: Nov 2004
Join Date: Nov 2004
Location: In the middle of nowhere in VA
Posts: 749
#
4
01-02-2005
, 08:33 PM

Subscriber
Join Date: May 2004
Join Date: May 2004
Location: Denmark
Posts: 816
 ) people prefer nurbs... It's a personal thing, but I think that the common opinion is that polys are easier to start off with than nurbs... I'd also recomend getting a good picture for reference, which means a picture as straight on as possible...
If you're willing to spend the dough, I think I saw a guitar tut over on SimplyLightwave.com. I think it was a Fender, but I'm sure the techniques can be used to model this instead...
Liter is French for 'Gimme some ****ing cola before I break vous ****ing lips!"
#
5
01-02-2005
, 11:04 PM
Subscriber
Join Date: Nov 2004
Join Date: Nov 2004
Location: In the middle of nowhere in VA
Posts: 749
#
6
02-02-2005
, 07:54 AM

Subscriber
Join Date: Mar 2004
Join Date: Mar 2004
Location: Miami, Fla
Posts: 149
but i belive you can use the Loft option to close off the sides.
Also, if you go into select by component and deselct "Select by Component type" and click on Select By parm points"
You can click and drag the yellow dot to each of the corners of you guitar head....once you have done this too all the corners where you would like to detach, select all the pieces again go to "edit curves>rebuild curve> options" and in the "Number of Spans" put 10 (or play aroun with this til you get it good, im still newb like I said so I am telling you by what I have done for some tutorial from a book I bought)
After Rebuilding, keep the curves selected and go to "Surfaces>Boundary"
This way you can fill up the top portion of the head.......I hope you understand me, i kindds suck at giving good written instructions.
I hope this helps, and if anyone can suggest something better....THANKS!! lol
Anyway good luck with that dude, i impatiently await this finished product.
oh and Blink ROCKS!

#
7
02-02-2005
, 03:08 PM
Subscriber
Join Date: May 2004
Join Date: May 2004
Location: Denmark
Posts: 816
Not quite sure what Dana's trying to do, but I'd probably use a Planar Surface for the front and back of the head. And if you need to round off the edges I'd suggest using Fillet and Trim (check out the tut here for info about how to do it)
Liter is French for 'Gimme some ****ing cola before I break vous ****ing lips!"
#
8
02-02-2005
, 04:28 PM
Subscriber
Join Date: Mar 2004
Join Date: Mar 2004
Location: Miami, Fla
Posts: 149
#
9
02-02-2005
, 04:29 PM
Subscriber
Join Date: Mar 2004
Join Date: Mar 2004
Location: Miami, Fla
Posts: 149
#
10
02-02-2005
, 04:51 PM
Subscriber
Join Date: May 2004
Join Date: May 2004
Location: Denmark
Posts: 816
Liter is French for 'Gimme some ****ing cola before I break vous ****ing lips!"
#
11
03-02-2005
, 12:18 AM
Subscriber
Join Date: Nov 2004
Join Date: Nov 2004
Location: In the middle of nowhere in VA
Posts: 749
thx
-RYan
Last edited by alienscience; 03-02-2005 at 12:20 AM.
#
12
03-02-2005
, 12:31 AM
Subscriber
Join Date: Nov 2004
Join Date: Nov 2004
Location: In the middle of nowhere in VA
Posts: 749
#
13
03-02-2005
, 01:08 AM
Subscriber
Join Date: Mar 2004
Join Date: Mar 2004
Location: Miami, Fla
Posts: 149
also, give what i suggested a try. It was used in a tut to make an axe. I did the contour curve andused that method to "fill in" the void
#
14
03-02-2005
, 03:41 AM

Subscriber
Join Date: Sep 2004
Join Date: Sep 2004
Location: Waianae, HI
Posts: 1,275
If you haven't checked out bevel plus (a new NURBS function) your really missing out. Also, Mayas ability to stitch multiply NURBS surface together while coverting to polys is also very cool.
AIM: mhcannonDMC
"If you love your job, you'll never work another day in your life."
#
15
03-02-2005
, 11:48 PM
Subscriber
Join Date: Nov 2004
Join Date: Nov 2004
Location: In the middle of nowhere in VA
Posts: 749
Mchannon(?): Thx for the help also but when I try to use bevel plus on my curves, it says "Error: Cannot convert data of type string to type int[]"
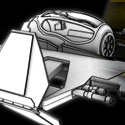
Oh, right now I am going to work on the body. I am holding off on the headstock for right now, thats going to be a pain. I am going to use nurbs just for the f-holes, I thought those might be hard in polys.
Posting Rules Forum Rules
Similar Threads
Guitar Strap plus Guitar
by Hansi3 in forum Animation replies 12 on 31-05-2013
a couple guitar videos
by Acid44 in forum Maya Basics & Newbie Lounge replies 11 on 21-10-2008
Behringer Guitar
by DJbLAZER in forum Work In Progress replies 56 on 20-10-2008
Cutting shape out of guitar
by IJke in forum Maya Basics & Newbie Lounge replies 9 on 23-01-2007
modeling a guitar
by MattTheMan in forum Maya Basics & Newbie Lounge replies 2 on 07-05-2005
Topics


Free Courses


Full Courses


VFX News
How computer animation was used 30 years ago to make a Roger Rabbit short
On 2022-07-18 14:30:13
Sneak peek at Houdini 19.5
On 2022-07-18 14:17:59
VFX Breakdown The Man Who Fell To Earth
On 2022-07-15 13:14:36
Resident Evil - Teaser Trailer
On 2022-05-13 13:52:25
New cloud modeling nodes for Bifrost
On 2022-05-02 20:24:13
MPC Showreel 2022
On 2022-04-13 16:02:13