Digital humans the art of the digital double
Ever wanted to know how digital doubles are created in the movie industry? This course will give you an insight into how it's done.
#
1
16-06-2006
, 03:15 PM
Subscriber
Join Date: Dec 2004
Join Date: Dec 2004
Location: Germany
Posts: 68
Rig Problem with Rigid Bind
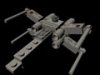
well, after all i am playing around with a rig for my mech.
Rigid Bind works perfect. No streching or whatever.
Problem is :
how do i get the footparts to move with the hydraulic unit and keep the option to change the space between the footpart and hydraulicunit in Y. In order to get real movement the hydraulic has to go in and out. :headbang:
I grouped the footparts and parented it to the hydraulic unit, but as soon as i bind the unit to a bone - all axis are greyed out.
So i can't move the footpart up. It's logical - no doubt, but is there some trick or workaround to leave the lower part free to move in Y while it's bound to a joint?
cheers
Mac
..the Force is with me (sometimes)
#
2
23-06-2006
, 07:43 PM
Registered User
Join Date: Feb 2005
Join Date: Feb 2005
Location: This Place
Posts: 220
Which is what you're going to have to do here....
Good news is I've done this before. Bad news is its minorly complicated.... ish
I'll try and explain this like how I did it....
Oh, and before you start, complete the joint chain by placing a new joint at the 'ankle'. You're going to need it, and having four joints in the chain shouldn't generate any problems. So, effectively, you'll have two hip joints, followed by a knee and an ankle joint (the blank area is between the knee and the new ankle joint).
1) First step is to parent all the pieces (or, at minimum, those pieces that are directly affected) by placing them into the joint heirarchy. So, for a piece going from, say, the hip to the knee, you place it in the hierarchy under the hip joint.
2) The piece that you want to be expanding, however, must be placed in the next joint down. So, if part of a leg between the knee and the ankle is supposed to expand, place it in the hierarchy under the ankle joint, NOT the knee joint (note, if you put in an ik joint at this point and move it around, you'll notice the piece moves wrong. Don't worry, that's fixed in the next couple of steps)
3) You're going to need a control curve. If the joint being affected is the effectively an ankle or wrist joint, this is seperate from whatever curve you should have for controlling ik handles. Anyways: Get a curve (probably a circle), and place it centered where the expanding joint is going to be (which in your case is I think the ankle joint) - that is, after the piece that will be moving is.... Put it into the joint heirarchy in this manner; after the upstream joint, and place the downstream joint into the circle. That is, here, put the circle into the joint heirarchy under the knee, and place the ankle joint into the circle (these last to should be at the same location)
4) you need another control curve! This one needs to observe two conditions. First, it should be the length that your joint can or should expand by (this is not necessarily the length of the actual piece itself). Second, it must be the path that your piece will follow during the expansion. In this case you seem to need a straight line, although I don't know how long. Put this curve as well into that same knee heirarchy
5) take a locator and 'motionPath' attach it to the expansion path curve. If you need to, reverse the curve direction - the starting location should be at the part where it expands from - here, the knee joint. Right click on 'uValue' and 'break connections'.
This step is purely optional. Useful if you want the rest location to be something other than the end of the curve, and if you want the posistion to be controlled by measurement referncing the global coordinates, rather than between 0 and 1.
6) If the 'rest' location isn't at one end of the control curve, you're going to have to monkey with MEL a little. The general form of the equation is : locator.uValue = (valDist + ("distance To 0 from end of curve")) / ("length of curve").
It is rather handy to have 'valDist' actually be a variable controlled from the iK handle control curve - it places it somewhere easily accesible, and makes it relatively easy to place a min/max clamp on it (although you don't really need one, given the way maya attaches things to curves....)
7) now, point constrain the ankle's circle to the locator. That is, first click the locator, then click the circle over the ankle (which should have the ankle joint inside its heirarchy). There should be no immediate change. But you should now be able to get the joint to expand by adjusting the locator's uValue. true, an ik handle that's attached won't immediately follow this location change, but it will still work, and the moment you grab and move the ik handle the rest of the chain will follow anyways.
only a couple of major steps left.
8) Remember that, because we parented the piece that expanded to the joint farther down the heirarchy, it didn't rotate properly if an ik handle was moved. we still need to fis that. this means two more constraints. First, you'll need yet another locator. Place it in line with the expanding joint, but otherwise centered in on the previous joint. That is, here, it should start out centered on the knee joint. If however, the expanding piece is off center, move it along whatever axis is necessary to line it up with that piece (so, either 'forwards' or 'backwards' in relation to the rest of the mech). Then, parent constraint the locator to the knee joint. Yes, you could put it inside the joint heirarchy, but we're doing something else with the locators later.
9) now, aim constraint the expanding piece to the locator that was parent constrainted to the knee joint. It may get a different initial rotation, but it should only be off in 90 of one direction or another - the point of placing the locator in line with it is to prevent odd aim directions, and bad posistioning when the joint expands or contracts.
your leg should now be ready to expand or contract. If you haven't already, create an iK handle to move the joint chain (yes, through all 4 bones). Also, create a curve to control the movement of the ik handle (center it more or less on the ankle). Parent the ik Handle to it, then hide the ik handle). also, group and hide all the locators. they shouldn't be moved in any case, and you don't really need to see them again. its also for that reason that I reccommend setting up a new attribute inside the ikHandle control curve, that can be read for the expansion of the joint
Anyways, its something like that. I probably ought to write a tutorial or something.... did that work for you?
Book Wise
https://X4nd5r.deviantart.com
#
3
23-06-2006
, 10:42 PM
Subscriber
Join Date: Dec 2004
Join Date: Dec 2004
Location: Germany
Posts: 68
Kewl
first of all a really big and warm THX ! I was nearly to give it up.
It's so cool to see someone, I even don't know, taking such a lot of time and effort to write a tut for me. :bow:
Ok then - the good news : all is working :attn:
The bad news - it took forever..hehe
I had to read the post about a 100 times to keep up with You.
Two main things were ringing a bell in my head : Parenting into the joint hierachy and a 2nd joint chain. So i tried to made all the contols lighter. At the end i came up with a complete new thing. Thx to your "little" tut.
I drew a cv curve straight down, a single joint on top of it and used the IK Spline Handle Tool. With the offset value of the ik handle i can slide the Joints along the curve. Since the vertex were drawn with gridsnap it results in a perfect straight motion up and down.Then binding the lower part of the foot to the joint and parenting the curve to the joint (as you said, into the hierachy) which is bound to the upper part of the leg.
Got a little playblast
here
Thx again for Your help

cheers
Mac
..the Force is with me (sometimes)
#
4
24-06-2006
, 06:17 AM
Registered User
Join Date: Feb 2005
Join Date: Feb 2005
Location: This Place
Posts: 220
Book Wise
https://X4nd5r.deviantart.com
Posting Rules Forum Rules
Similar Threads
t-rex rig problem !
by gtam456 in forum Maya Basics & Newbie Lounge replies 1 on 28-10-2012
Problem when switching to soft selection mode
by Skalman in forum Maya Technical Issues replies 2 on 23-04-2012
Rigid bind stretching problem. Why is this happening?
by hulkis2001 in forum Maya Basics & Newbie Lounge replies 0 on 16-02-2006
Where did the rigid bind window go? I can't see it. Help please!
by hulkis2001 in forum Maya Basics & Newbie Lounge replies 0 on 15-02-2006
Werewolf mouth blendshape problem. What's going on?
by hulkis2001 in forum Animation replies 1 on 14-02-2006
Topics

Free Courses


Full Courses


VFX News
How computer animation was used 30 years ago to make a Roger Rabbit short
On 2022-07-18 14:30:13
Sneak peek at Houdini 19.5
On 2022-07-18 14:17:59
VFX Breakdown The Man Who Fell To Earth
On 2022-07-15 13:14:36
Resident Evil - Teaser Trailer
On 2022-05-13 13:52:25
New cloud modeling nodes for Bifrost
On 2022-05-02 20:24:13
MPC Showreel 2022
On 2022-04-13 16:02:13