Digital humans the art of the digital double
Ever wanted to know how digital doubles are created in the movie industry? This course will give you an insight into how it's done.
# 1 21-01-2012 , 04:44 PM
goggles's Avatar
Registered User
Join Date: Sep 2011
Posts: 219

Stitch UV or not? Uv layout puzzle !

Hey there people ! I used Headus UV layout for an ongoing project. The piece i used caused some folding and ovelapping problems when i tried to layout uvs in headus software. So i had to cut in smaller pieces. Is this way right or wrong to layout uvs? I am currently back in maya and confused about how to go on. Should i stitch the pieces in maya. If so how and in which form ? If not, is there a better way i can follow and start over again user added image

https://img864.imageshack.us/img864/391/uv1ta.jpg

https://img205.imageshack.us/img205/7735/uv2v.jpg

https://img513.imageshack.us/img513/9708/uv3a.jpg

# 2 21-01-2012 , 07:42 PM
jsprogg's Avatar
Lifetime Member
Join Date: Feb 2004
Location: Chicago
Posts: 1,712
You should attempt to have the minimum amount of seams while still avoiding stretching so yes ,stitch what you can still keeping your UV's flat.
If you have to have seams then try to hide those in parts of the model that won't be seen often or at all if a still image.
As a side note you should scale the UV's up to fit into the 0-1 space as tight as possible so as to give your texture the maximum amount of resolution you can on the texture map.

Looking at you object perhaps headus UV was not the best choice to map it since it is a pelt type unwrapper and a cylindrical map projection would suit your object better.If you don't already know this ,you can select faces on your object and map only those faces elected and build up your UV's that way..for example map the outside faces of the cylindical part of the object then the inside separately then perhaps the squarish part separately with a planar map. Finally sew what you can together.


2 x Modeling Challenge Winner

Last edited by jsprogg; 21-01-2012 at 07:49 PM.
# 3 21-01-2012 , 07:50 PM
goggles's Avatar
Registered User
Join Date: Sep 2011
Posts: 219
By looking at the mesh, how good my layouts are? Could it be done in less uv pieces? Or does it look good?

# 4 21-01-2012 , 07:54 PM
jsprogg's Avatar
Lifetime Member
Join Date: Feb 2004
Location: Chicago
Posts: 1,712
looking at the object you could lay this out in probably 2 pieces ..i will post a pic in a sec for you.


2 x Modeling Challenge Winner
# 5 21-01-2012 , 07:56 PM
daverave's Avatar
The thin red line
Join Date: Aug 2009
Location: England
Posts: 4,472
I would be looking for that part of the model 1 to at most 3 uv sets............dave


Avatar Challenge Winner 2010
# 6 21-01-2012 , 08:07 PM
jsprogg's Avatar
Lifetime Member
Join Date: Feb 2004
Location: Chicago
Posts: 1,712
Something like this..

Attached Thumbnails


2 x Modeling Challenge Winner
# 7 21-01-2012 , 08:11 PM
goggles's Avatar
Registered User
Join Date: Sep 2011
Posts: 219
I see, lets work on that stitches : /

# 8 21-01-2012 , 08:18 PM
jsprogg's Avatar
Lifetime Member
Join Date: Feb 2004
Location: Chicago
Posts: 1,712
If you want you could post the object and i will lay it out for you so you can study it.


2 x Modeling Challenge Winner
# 9 21-01-2012 , 08:22 PM
bullet1968's Avatar
Lifetime Member
Join Date: Feb 2010
Location: Australia
Posts: 4,255
jsprogg hit it on the head. I have used different colours on the faces I want to UV since I did the Spitfire tut...just so you dont get confused between parts. I would have done exactly as he said, inside faces, outside faces>stitch and the box last.

cheers bullet


bullet1968

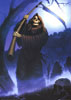
"A Darkness at Sethanon", a book I aspire to model some of the charcters and scenes
# 10 21-01-2012 , 09:16 PM
goggles's Avatar
Registered User
Join Date: Sep 2011
Posts: 219

Attached Files
File Type: zip 1.zip (53.4 KB, 598 views)
# 11 21-01-2012 , 09:57 PM
daverave's Avatar
The thin red line
Join Date: Aug 2009
Location: England
Posts: 4,472
I got this down to 1 uv set may be 2 would be better less stretch, I used roadkill and then unfold..........dave

Attached Thumbnails


Avatar Challenge Winner 2010
# 12 21-01-2012 , 10:13 PM
goggles's Avatar
Registered User
Join Date: Sep 2011
Posts: 219
Err... I was still moving and rotating pieces to stitch user added image Ok giving a break here to see uv tool threads and watching some tutorials on roadkill... I think it will save huge time later on...

# 13 21-01-2012 , 10:22 PM
daverave's Avatar
The thin red line
Join Date: Aug 2009
Location: England
Posts: 4,472
Dont feel down I was doing UVs at the moment so am in the zone............dave


Avatar Challenge Winner 2010
# 14 21-01-2012 , 10:58 PM
goggles's Avatar
Registered User
Join Date: Sep 2011
Posts: 219
On the tank project i think. I am following the work. I am learning lots of stuff from experienced members. I think this forum made me wanna learn more. Didn't feel down, infact i find the replies very useful.

# 15 22-01-2012 , 06:24 PM
Jay's Avatar
Lead Modeler - Framestore
Join Date: Feb 2003
Location: UK
Posts: 6,287
Some interesting layouts for this object on the goggles....

Heres what I did. Just two cylindrical maps (inside and out) for the main bit. Planar x2 for the circles...and the nose pieces was a quick auto map into three bits.

JSprogg is right about keeping the seam count down as much as possible. Sometimes its unavoidable on certain objects so dont always feel you need to do stuff all in one go. As dave says you can get stretching and adding the extra piece can help. Above all just make sure the uv is clean and the uv texturemap numbers are square. When testing for stretching I increase the u and v repeats on the test pattern this way you can spot stretching easier as opposed to bigger squares where it isnt as obvious between each poly

cheers
J

Attached Thumbnails
Posting Rules Forum Rules
You may not post new threads | You may not post replies | You may not post attachments | You may not edit your posts | BB code is On | Smilies are On | [IMG] code is On | HTML code is Off

Similar Threads