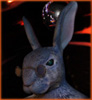
actually i noticed that a fly's body tends to have a blue tint as you move towards the edges and a yellow specular highlight - so the sampler info node was used to try to create that effect. i added a yellow tinted color map for the spec map, but i think i'm going to get rid of that as it doesn't seem to be working.Originally posted by AikoWorld
if i understand it correctly your samplerinfo is created for the edges of you geometry creating like a reversed occlusion, but instead of a static collor you can add an image to it
Or a more relevant file is a ramp.
Well i dont know if thats what you tried to create.
Cool shading network!
Introduction to Maya - Rendering in Arnold
This course will look at the fundamentals of rendering in Arnold. We'll go through the different light types available, cameras, shaders, Arnold's render settings and finally how to split an image into render passes (AOV's), before we then reassemble it i
#
151
09-11-2007
, 11:31 PM

Registered User
Join Date: Dec 2005
Join Date: Dec 2005
Location: Brooklyn, NY
Posts: 3,708
#
152
10-11-2007
, 01:38 AM
Subscriber
Join Date: Mar 2005
Join Date: Mar 2005
Location: Illinois, USA
Posts: 250
I'm not completely sure what's happening all over the place, but I think you could adjust the ramp a bit more so that instead of just overall being 2 values it fades between 3, which is more of what I see in the reference image - and that's created with an overall ramp for the color, and a tighter one for the spec

#
153
10-11-2007
, 02:31 AM
Registered User
Join Date: Dec 2005
Join Date: Dec 2005
Location: Brooklyn, NY
Posts: 3,708
#
154
10-11-2007
, 07:17 PM

Registered User
Join Date: Jun 2004
Join Date: Jun 2004
Location: Gothenburg, Sweden
Posts: 1,318
#
155
25-11-2007
, 01:41 AM
Registered User
Join Date: Dec 2005
Join Date: Dec 2005
Location: Brooklyn, NY
Posts: 3,708
#
156
25-11-2007
, 01:42 AM
Registered User
Join Date: Dec 2005
Join Date: Dec 2005
Location: Brooklyn, NY
Posts: 3,708
#
157
25-11-2007
, 01:43 AM
Registered User
Join Date: Dec 2005
Join Date: Dec 2005
Location: Brooklyn, NY
Posts: 3,708
#
158
25-11-2007
, 01:44 AM
Registered User
Join Date: Dec 2005
Join Date: Dec 2005
Location: Brooklyn, NY
Posts: 3,708
#
159
25-11-2007
, 01:46 AM
Registered User
Join Date: Dec 2005
Join Date: Dec 2005
Location: Brooklyn, NY
Posts: 3,708
#
160
25-11-2007
, 02:20 PM
Subscriber
Join Date: Jul 2005
Join Date: Jul 2005
Location: London
Posts: 520
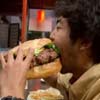
If that's your workplace I take you're some kind of a security guard?
www.animateme.me.uk
#
161
25-11-2007
, 07:01 PM
Registered User
Join Date: Dec 2005
Join Date: Dec 2005
Location: Brooklyn, NY
Posts: 3,708
#
162
28-11-2007
, 05:40 AM

Registered User
Join Date: Mar 2006
Join Date: Mar 2006
Posts: 296
Good work
Btw are you use maya software? some build method is specialties.
keep up!
#
163
28-11-2007
, 08:26 AM

Registered User
Join Date: May 2004
Join Date: May 2004
Location: UK
Posts: 1,991
I cant wait to see the fruits of your labour, have you got any timescales for it or are you just going to keep going and see how it develops?
Examples of bTraffic - a traffic animation tool for Maya
bFlocking - a tool for Maya 8.5+ to generate flocking and swarming behaviours
Jan/Feb Challenge 2007 Entry and W.I.P
May/Jun Challenge 2006 Entry and W.I.P
Mar/Apr Challenge 2006 Entry and W.I.P
Jan/Feb Challenge 2006 Entry and W.I.P
Nov/Dec Challenge 2005 Entry and W.I.P
Sep/Oct Challenge 2005 Entry and W.I.P
Jul/Aug Challenge 2005 Entry
www.flash-fx.net
#
164
28-11-2007
, 10:00 AM
Registered User
Join Date: Dec 2005
Join Date: Dec 2005
Location: Brooklyn, NY
Posts: 3,708
 the renders are all mental ray, usually with a bit of final gather turned on. Not sure what you mean by 'some build method is specialities'
 thanks t1ck!
yeah - i'm hoping to get this finished up (fairly) soon. Problem is i need to be at work to do most of it. the whole point was to focus on textures and get it to look as close to where i work as possible. here's a chair that i've been modeling - i'm hoping to use a procedural to texture it, but i'm not sure how to do the zigzag pattern.
#
165
28-11-2007
, 11:56 AM

Subscriber
Join Date: Jan 2006
Join Date: Jan 2006
Location: IL
Posts: 1,052
A great mod for Jedi academy www.moviebattles.com
Computer Rig-
64-bit vista
23.5 inch LCD + a 19 inch
Q6600 intell qaud
4 gigs of ddr2 ram
8800GTS 512 video card @700mhz
Posting Rules Forum Rules
Similar Threads
where can i download free maya 3d objects?
by duyquyen in forum Maya Basics & Newbie Lounge replies 9 on 12-10-2012
Alternative to Grouping Objects?
by AlienHook in forum Maya Basics & Newbie Lounge replies 4 on 16-05-2012
Strange Problem - Unable to change attributes for multiple objects
by anthonysw3 in forum Maya Technical Issues replies 4 on 04-12-2010
Problems with multiple collision objects
by Uglynakedguy in forum Maya Technical Issues replies 1 on 08-05-2008
Freelance Work
by doodle in forum Maya Basics & Newbie Lounge replies 7 on 05-11-2004
Topics


Free Courses


Full Courses


VFX News
How computer animation was used 30 years ago to make a Roger Rabbit short
On 2022-07-18 14:30:13
Sneak peek at Houdini 19.5
On 2022-07-18 14:17:59
VFX Breakdown The Man Who Fell To Earth
On 2022-07-15 13:14:36
Resident Evil - Teaser Trailer
On 2022-05-13 13:52:25
New cloud modeling nodes for Bifrost
On 2022-05-02 20:24:13
MPC Showreel 2022
On 2022-04-13 16:02:13