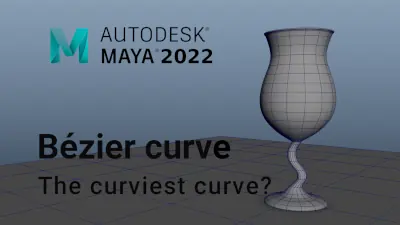
Beer glass scene creation
This course contains a little bit of everything with modeling, UVing, texturing and dynamics in Maya, as well as compositing multilayered EXR's in Photoshop.
#
1
28-10-2007
, 07:46 PM
Registered User
Join Date: Oct 2007
Join Date: Oct 2007
Location: baton rouge, la
Posts: 11
Combining Vertices/edges!
#
2
28-10-2007
, 08:05 PM
1 Make sure that the object you want to duplicate has it's center verts on the center Axis Line.
You can select one or all the edge verts and switch to the move tool ( in the options of the move tool turn off Keep Component Spacing)the slect the X- axis only on the move tool .Now hold down Ctrl X and Middle button drag over the Center axis on the grid and the verts will snap to the center.
2 Now you have to make sure your pivot is also on the Center axis of the grid.
To do this Select the geometry you want to mirror over the switch to the move tool.Hit insert (Ins) on the keyboard and the hold down ctrl + X and once again Middle button drag over the Center axis on the grid.
Finally hit insert again to complete the pivot move.
3 Duplicate your object then in the channel box (top right) type in -1 in the scale X.
4 Select both pieces of geometry and go to Mesh and then hit Combine.
5 Select the vertices in the center that need joining and under Edit Mesh pick the option box of the Merge and set the Threshold to 0.001 then hit apply.
You should now have one object completely joined.

2 x Modeling Challenge Winner
#
3
28-10-2007
, 08:27 PM
first of all -> make the faceNormals show up. then you will understand better what I am talking about.
if you flip (scale in a minus direction like from X to -X) you can run into some problems afterwards. my workflow is this:
flip geometry. then do a freezeTransformation on the flipped geometry. as you can see, the normals flipped also now pointing to the inside of your geometry. this is bad. you can merge vertices from 2 objects which have diverging faceNormals but you create a nonmanifold geometry by doing so. to avoid that you freeze transformation and reverse normals. now all normals point into the same direction. when applying mergeVertex now the seam between both objects should dissappear.
if not all of your verts are merged they probably have different distance to the flipping axis. to bring all in one line quickly activate the move tool. in the tool options uncheck Retain Component Spacing (dont forget to check it again after). this makes sure the selected verts dont have a single pivotpoint. if you use the X-key now on your keyboard while moving, the selection gets snapped to the grid. since you turned off ret comp spacing all verts snap to the grid and not just the selection´s pivotPoint.
and don´t ever use instance duplication if you want to combine things! this would be bad also! XD
sorry for my bad english! hope you understood what I tried to explain.
good luck!
everything starts and ends in the right place at the right time.
#
4
28-10-2007
, 09:06 PM

2 x Modeling Challenge Winner
Last edited by jsprogg; 28-10-2007 at 09:11 PM.
#
5
29-10-2007
, 01:44 PM
 I just wanted to explain what´s going on behind the scene. since i create animation ready models for realtime all day long, I ran in all those problems myself he mentioned before. I think if someone understands the basics and rules it is not so complicated anymore. now after you corrected me you did make this issue about flipping and normals even clearer I in my opinion.
have a good time!
everything starts and ends in the right place at the right time.
Posting Rules Forum Rules
Similar Threads
Combining Mulitple Textures Into One
by JaysonWatson in forum Maya Basics & Newbie Lounge replies 0 on 05-06-2018
Combining Polygons
by araya203 in forum Maya Modeling replies 1 on 10-01-2015
Combining, maya locks up
by trikeman in forum Maya Basics & Newbie Lounge replies 3 on 30-03-2006
Combining Polys, Mel script?
by mahpiya in forum Maya Modeling replies 2 on 04-09-2005
poly combining and separate
by jsnelson in forum Maya Modeling replies 2 on 24-11-2004
Topics
Free Courses
Full Courses
VFX News
How computer animation was used 30 years ago to make a Roger Rabbit short
On 2022-07-18 14:30:13
Sneak peek at Houdini 19.5
On 2022-07-18 14:17:59
VFX Breakdown The Man Who Fell To Earth
On 2022-07-15 13:14:36
Resident Evil - Teaser Trailer
On 2022-05-13 13:52:25
New cloud modeling nodes for Bifrost
On 2022-05-02 20:24:13
MPC Showreel 2022
On 2022-04-13 16:02:13


