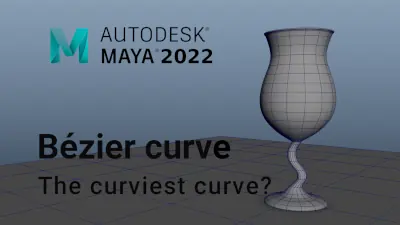
Beer glass scene creation
This course contains a little bit of everything with modeling, UVing, texturing and dynamics in Maya, as well as compositing multilayered EXR's in Photoshop.
#
1
21-12-2012
, 01:22 AM
Cain - Robocop 2
www.ukmonsters.co.uk/robocain
Well going though a lot of my old un-finnshed projects and I came across this one...
https://simplymaya.com/forum/showthread.php?t=28556
Lets start again me thinking. Well I have learnt a lot since then and I still have a lot to learn. - Focus of this project will be rendering and robot rigging. That guys model is perfect ref, but also got the images he based his design off (Photos from Tippett studios) and I also have a small scale figure of him as well - the one he uses to compare his giant model too in that pic.
Starting tomorrow from scratch was ref hunting tonight and thought I would share that guys work and set up the W.I.P

Last edited by tweetytunes; 07-01-2013 at 10:41 PM.
#
2
22-12-2012
, 01:16 AM
#
3
22-12-2012
, 11:33 AM
Robocop 2: Caine snaps - YouTube

Avatar Challenge Winner 2010
#
4
22-12-2012
, 12:14 PM
Here are the refs I was working off (Rip the sequence from the Bluray copy of the film - and that guys model).
I have got the thick frame just not the holding platform the screen sits in there yet - Plus I wanted to make it more widescreen like the guys model - as square screens to me now just look wrong. But just noticed I have the holder (block at bottom) too high.

#
5
06-01-2013
, 02:47 AM
so in the mean time going to just start making some of the other parts and then sort out the scale and placements after.
Got the two arm lights done - these are different on every bit of ref I have (film, 2 different model kits and that guys model) so gone for mixer of the lot but may change it up after.


#
6
06-01-2013
, 07:56 PM

Ha just noticed - Been coming here for 9 years - I can honestly say this is the only site I have been coming to for that long - Where has the time gone ??

Last edited by tweetytunes; 06-01-2013 at 09:04 PM.
#
7
06-01-2013
, 10:59 PM


Last edited by tweetytunes; 07-01-2013 at 06:08 PM.
#
8
08-01-2013
, 12:57 AM
Think I have nailed the shape of the toe - Moving on to the legs next.


#
9
08-01-2013
, 12:51 PM
#
10
09-01-2013
, 12:36 PM


Right that`s the feet done - modelling wise - time to hit the legs.

#
11
09-01-2013
, 03:26 PM
...
You know you have been working too long in cg when your out side and you look up at the trees and say
"Wow that's spectacular resolution ."
#
12
09-01-2013
, 10:31 PM
Finshed of the lower leg but as the render finished I noticed a ding in the front rod I`m going to have to go fix - but this is coming together nicely. Some real tricky shape to this monster.

Just looking back on my first go at this guy (from 5 years ago now) and I am at the same sort of point - what a difference in skill I have now...

Last edited by tweetytunes; 09-01-2013 at 11:00 PM.
#
13
09-01-2013
, 11:12 PM
 just joking tweeny. Looking good but have thought about not smoothing every thing but using geo and bevelling to get the same result (thats not on every thing just some parts).................dave

Avatar Challenge Winner 2010
#
14
09-01-2013
, 11:58 PM
This is one curvy S.O.A.B - There is very little parts without a curve. So far there is only 1 box, which has been beveled. Everything else has had to have a part rounded. I not too worried though. The process is easy enough and the resaults are looking great. Polycount is still quite low.

#
15
10-01-2013
, 02:32 PM

Just noticed some normal issues on the knee pad that have been corrected now but not worth a re-render.

Last edited by tweetytunes; 10-01-2013 at 02:35 PM.
Posting Rules Forum Rules
Similar Threads
trying to model swan shaped 2 text character
by aEromooo in forum Maya Basics & Newbie Lounge replies 5 on 05-07-2011
Birail 2 problem
by Shad0X in forum Maya Basics & Newbie Lounge replies 2 on 07-11-2005
The Oliphant Tutorial
by bradjames in forum SimplyMaya Tutorials replies 13 on 02-08-2004
Tournament #2 - Signup
by M in forum Battle Arena replies 35 on 22-05-2003
50 Unexpected Effects
by deviantdreamworks in forum Maya Basics & Newbie Lounge replies 0 on 06-10-2002
Topics
Free Courses
Full Courses
VFX News
How computer animation was used 30 years ago to make a Roger Rabbit short
On 2022-07-18 14:30:13
Sneak peek at Houdini 19.5
On 2022-07-18 14:17:59
VFX Breakdown The Man Who Fell To Earth
On 2022-07-15 13:14:36
Resident Evil - Teaser Trailer
On 2022-05-13 13:52:25
New cloud modeling nodes for Bifrost
On 2022-05-02 20:24:13
MPC Showreel 2022
On 2022-04-13 16:02:13


