Introduction to Maya - Modeling Fundamentals Vol 2
This course will look in the fundamentals of modeling in Maya with an emphasis on creating good topology. It's aimed at people that have some modeling experience in Maya but are having trouble with
complex objects.
#
1
24-02-2004
, 08:08 AM

Moderator
Join Date: Jan 2004
Join Date: Jan 2004
Location: Michigan, USA
Posts: 2,998
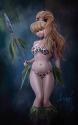
First attempt at a nurb patch human model
I started this a while ago but stopped working on it to learn more about the basics of maya. It was really to ambisious a project as my first nurbs model in maya.
The boy is my nephew. I used a digital photos for reference materials.
(1) The first photo is the basic nurbs head mass
(2) The patches I have completed. I stopped because I was not really happy with some of the patches and decided to take a break to rethink how I want to complete it.
(3) The full body so far.
I will probably start with the base nurb head mass and keep the nose patch. I am not happy with the way the eyes were progressing and I will probably scrap them and start over.
Probably scrap the mouth as well. The lips are looking strange and I have not been able to put my finger on it, but I'll figure em out as I get more of the chin and cheek area patched.
The ears are just fast and dirty place holders.
The shirt and pants I modeled from the reference photo.
The shoes, hair and hands are subd's I imported from the sybex master maya book.
Last edited by ctbram; 24-02-2004 at 08:48 AM.
#
2
24-02-2004
, 08:10 AM
Moderator
Join Date: Jan 2004
Join Date: Jan 2004
Location: Michigan, USA
Posts: 2,998
#
3
24-02-2004
, 08:11 AM
Moderator
Join Date: Jan 2004
Join Date: Jan 2004
Location: Michigan, USA
Posts: 2,998
#
4
24-02-2004
, 08:23 AM
Moderator
Join Date: Jan 2004
Join Date: Jan 2004
Location: Michigan, USA
Posts: 2,998
Last edited by ctbram; 13-03-2004 at 10:42 PM.
#
5
24-02-2004
, 08:44 AM
Moderator
Join Date: Jan 2004
Join Date: Jan 2004
Location: Michigan, USA
Posts: 2,998
#
6
24-02-2004
, 04:16 PM
Registered User
Join Date: May 2002
Join Date: May 2002
Location: Niagara Falls, Canada
Posts: 5,310
I am enough of an artist to draw freely upon my imagination, knowledge is limited, imagination encircles the world. (Albert Einstein)
https://www.artstation.com/kurtb
#
7
24-02-2004
, 04:18 PM

The Maya Mountain
Join Date: Aug 2002
Join Date: Aug 2002
Location: Seattle, WA
Posts: 8,245
 NURBS patch modeling can be very tricky, and it looks like you've gotten the hang of it very well.
#
8
24-02-2004
, 04:53 PM

Subscriber
Join Date: Jun 2003
Join Date: Jun 2003
Location: stuck in the 90's boston, USA
Posts: 1,871
Last edited by vladimirjp; 24-02-2004 at 04:56 PM.
#
9
24-02-2004
, 05:31 PM
Moderator
Join Date: Jan 2004
Join Date: Jan 2004
Location: Michigan, USA
Posts: 2,998
The mouth patch is okay but I think it will need to be refined when I get more of the surrounding cheek patches in.
The eye patches will need to be redone. At some point I tried to reduce the geometry and refine the mesh and I lost a ton of detail then I overwrote the file, (newbie lession number 1 - backup to seperate file and backup often!).
The patch network is boluxed and that is why I stoped the model at this point. I intend to come back and finish it but I decided to take a detour and learn more about basic maya modelling with polygons and poly proxies and subd's first.
Jumping into a major human nurbs patch modelling project as ones first forray into maya is probably not the best way to go. The initial massing goes really fast in nurbs but adding detailed patches and then then patch network require a lot of work and pre-planning.
I might redo this project in polygon modelling then use the polygon mesh and draw on surface to build the base nurbs network and then complete the nurbs model.
For me I am thinking nurbs (basic massing) -> poly's/poly proxy for roughing in details and bulding a rough nurbs network -> back to nurb's to complete the model, might be a better way to go. This way I will use the poly model as a wrap deformer and as a starting surface to build my nurbs network from.
This has the added bonus of being able to make a very light poly model that I can then dress in some embarrasing outfit and put into one of the first person shooters. Problem is I have not seen any 3d game that your can added your own models AND skins to yet.

Thanks for the comments.
I am learning all the time and maya is a blast!
Cheers
Last edited by ctbram; 04-03-2004 at 04:01 PM.
#
10
24-02-2004
, 06:11 PM
Moderator
Join Date: Jan 2004
Join Date: Jan 2004
Location: Michigan, USA
Posts: 2,998
Last edited by ctbram; 24-02-2004 at 06:14 PM.
#
11
24-02-2004
, 08:07 PM

Registered User
Join Date: Jan 2003
Join Date: Jan 2003
Location: AB, Canada
Posts: 550
#
12
25-02-2004
, 01:27 PM
Registered User
Join Date: Dec 2003
Join Date: Dec 2003
Location: Lisbon
Posts: 71

Liked you model, looking forward for the development
weld some pixels !!!
Posting Rules Forum Rules
Similar Threads
Will I be able to texture this model?
by Hoaxs in forum Maya Basics & Newbie Lounge replies 4 on 06-08-2014
Preparing for zbrush, a model to be brought back to maya
by gubar in forum Maya Basics & Newbie Lounge replies 6 on 02-01-2008
Apply blendshapes to a duplicate model
by Tammy in forum Maya Basics & Newbie Lounge replies 3 on 09-08-2007
Febuary Model - Topic
by Kevin in forum Previous Challenges (Archives) replies 24 on 01-03-2003
how to texture my patch dragon leg
by yyn in forum Maya Materials & Textures replies 3 on 20-11-2002
Topics


Free Courses


Full Courses


VFX News
How computer animation was used 30 years ago to make a Roger Rabbit short
On 2022-07-18 14:30:13
Sneak peek at Houdini 19.5
On 2022-07-18 14:17:59
VFX Breakdown The Man Who Fell To Earth
On 2022-07-15 13:14:36
Resident Evil - Teaser Trailer
On 2022-05-13 13:52:25
New cloud modeling nodes for Bifrost
On 2022-05-02 20:24:13
MPC Showreel 2022
On 2022-04-13 16:02:13