Complex UV Layout in Maya
Over the last couple of years UV layout in Maya has changed for the better. In this course we're going to be taking a look at some of those changes as we UV map an entire character
# 1 04-04-2007 , 10:46 AM
Registered User
Join Date: Mar 2007
Location: Derby UK/Kent UK (Uni)
Posts: 10

First Car (Merchilago)

Okie doke ive been working on this for the past 3 weeks between university terms, i thought id do it after seeing one of my best mates model a dam fine subaru imprezza. This is by far the most complex model ive done before, even on my animation degree ive not done anything as difficult as this, there are a few errors, im aware of that but at the moment im too lazy to go back and edit them. Here are a few clay renders of it anyway. Its low poly, 9 k total including wheels.

user added image user added image user added image user added image

# 2 04-04-2007 , 02:25 PM
Jr.Who
Guest
Posts: n/a
What did you do to the pics?! I can barely see the car!

# 3 04-04-2007 , 02:50 PM
petrol's Avatar
Subscriber
Join Date: Mar 2005
Location: London UK
Posts: 351
Looks like a really poor ambient occlusion render.... with a plane / object above the car for some reason (probably a ref plane?)

# 4 04-04-2007 , 03:17 PM
Subscriber
Join Date: Feb 2006
Posts: 1,937
i reckon it looks pretty good soo far not the best though. youved got the general shape etc etc and just need to smooth them hard rough edges and that.

also about the renders, i dont think you should really use ambient occlusion cars really, i reckon you should use some shiny material such as phong or something so make it stand out abit more, thats my two cents user added image

keep us updated, love to see more ...

cheers, marlon

# 5 04-04-2007 , 06:52 PM
Registered User
Join Date: Mar 2007
Location: Derby UK/Kent UK (Uni)
Posts: 10
thanks for the comments, but as for the occlusion, its the first time ive tried it, it was followed off another member who said how to show a clay render, it didnt turn out quite how expected but i cant figure out how to get it looking the way his did. As for the model i could make it smoother, although i dont think i have the time with my upcoming uni term in which i have to produce a showreel. I will be texturing and lighting it however soon. More shots to come later

# 6 04-04-2007 , 09:48 PM
99GsTurbo's Avatar
Subscriber
Join Date: Oct 2006
Location: Boston
Posts: 566
***edit***

scroll down for updated settings


Toyota Supra WIP


I create feeling in others that they themseleves don’t understand.

Last edited by 99GsTurbo; 05-04-2007 at 02:57 AM.
# 7 05-04-2007 , 02:35 AM
Subscriber
Join Date: Feb 2006
Posts: 1,937
hey turbo, where abouts are all these, i seem to cant find it ...

"5. choose final gathering and make sure its checked. under accuracy: i have mines set at 1024, the size of my renders, Point Density: 1.000, Point Interpolation: 10, scale: pure white. and preview final father tiles: make sure its checked."

thanks man

# 8 05-04-2007 , 02:47 AM
99GsTurbo's Avatar
Subscriber
Join Date: Oct 2006
Location: Boston
Posts: 566
Hey marlon, under the mental ray tab, it should be under the final gathering section. Heres a screen shot of what I am talking about, I hope this helps

Attached Thumbnails

Toyota Supra WIP


I create feeling in others that they themseleves don’t understand.
# 9 05-04-2007 , 02:51 AM
Subscriber
Join Date: Feb 2006
Posts: 1,937
urggh :headbang: i think i may have found the problem ... your running maya 8 i believe? im running 7 user added image lol dam

# 10 05-04-2007 , 02:56 AM
99GsTurbo's Avatar
Subscriber
Join Date: Oct 2006
Location: Boston
Posts: 566
Ok heres the better set of instructions that will work for ever versions on maya


1. Render Settings window > Image Based Lighting section > click on the Create IBL button. Now set the IBL mode to texture and set the texture color to white (you can set the V - from HSV - to higher than 1 values to get whiter results).

2. In the Mental ray tab under render settings, at the very top should be quality presets. Use Productions for you preset so there is less editing.

3. Under the Anti-Aliasing tab, set the min samples to 2 and the max samples to 4. Also, set the filter to mitchell

4. Under the Final Gathering tab, make sure u check the box to enable Final Gather, enable the Final Gather View (Pixel Size) and set the FG min/max to 2-20. Also increase the FG Filter to 2 and choose an appropriate FG rays number ( on mines, i choose 1024 ::the accuracy part:user added image. Oh and to get better images, enable Secondary Diffuse Bounces, then set the FG Depth/Reflect/Refract to 3/3/0 (this means 3 secondary bounces) and also set the Shadow Trace Detph to 4 (it's under the Raytrace section)

5. Render Settings window > disable default light

6. Next go into ur hypershade and choose a DGS_material.
Difuse: A Light sliver or whatever color you want ur clay to look like
Glossy: Pure Black
Specular: Pure Black
Shiny: 50.000
Shiny_u: 0.000
Shiny_v: 0.000
Transp: 0.000
lor: 1.000

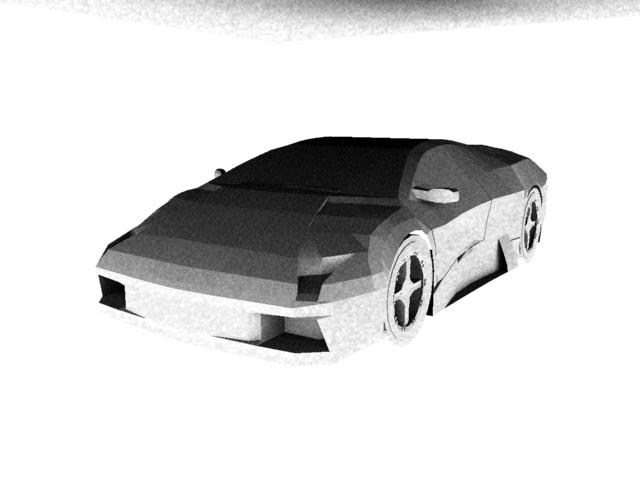
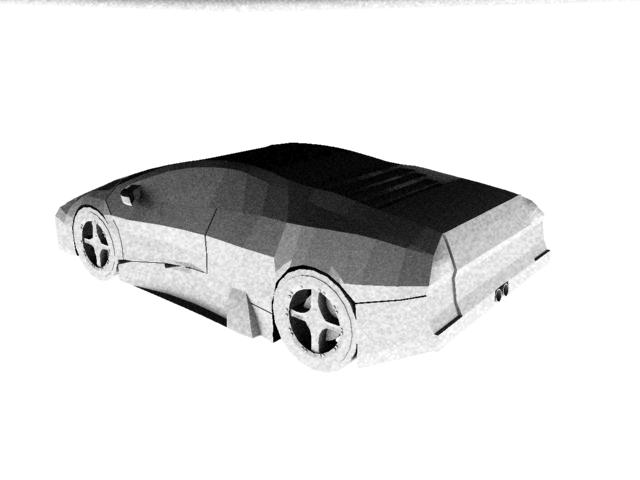
now u have all the settings, under ur car create a plane for the car to sit on and 1 plane to go into the background so that you dont see anything open. I applied the default lambert on those planes so that the car doesnt blend in with the background and apply the DGS_Material to the complete car.

There you go, I hope this helps


Toyota Supra WIP


I create feeling in others that they themseleves don’t understand.

Last edited by 99GsTurbo; 05-04-2007 at 09:24 AM.
# 11 05-04-2007 , 03:07 AM
Subscriber
Join Date: Feb 2006
Posts: 1,937
cool going to try this now, do i start from skratch or just continue from step 5?

# 12 05-04-2007 , 03:10 AM
99GsTurbo's Avatar
Subscriber
Join Date: Oct 2006
Location: Boston
Posts: 566
start from scratch. Sorry about that but it should only take about 5 mins to get the settings right. also when u create the ibl node, its going to put a sphere in the center. make sure everything that is being rendered is within that sphere that the ilb node creates.


Toyota Supra WIP


I create feeling in others that they themseleves don’t understand.
# 13 05-04-2007 , 03:22 AM
Subscriber
Join Date: Feb 2006
Posts: 1,937
hmm thanks but i dont think im doing something right user added image ill post it later on when i eat lunch if bagera dosnt mind user added image

# 14 05-04-2007 , 03:25 AM
99GsTurbo's Avatar
Subscriber
Join Date: Oct 2006
Location: Boston
Posts: 566
Hmmm yes please post, hopefully he doesnt mind. Also tomorrow, i might make the scene for everyone in version 7 and just attach it. it should be small since i will only have a sphere or something tiny that i have worked on


Toyota Supra WIP


I create feeling in others that they themseleves don’t understand.
# 15 05-04-2007 , 09:21 AM
99GsTurbo's Avatar
Subscriber
Join Date: Oct 2006
Location: Boston
Posts: 566
hey i think i know what ur problem was. remember, i said in the first post that set the quality to production so that there will be less editing. I did tell u to start form scrap and I left that detail out so I will add it in there. Set the quality preset to production then under anti-aliasing set the min to 2 and the max to 4. also for AA filter, i have mines set at mitchell. that should work. i just did a render in 7 and it worked perfect.


SORRY GUYS if this is off topic


Toyota Supra WIP


I create feeling in others that they themseleves don’t understand.
Posting Rules Forum Rules
You may not post new threads | You may not post replies | You may not post attachments | You may not edit your posts | BB code is On | Smilies are On | [IMG] code is On | HTML code is Off

Similar Threads