Now I've been racking my brain to try and figure this out and it I've tried everything that I know, but it's not working properly. So, I decided the last resort was to post here and maybe someone could help me figure out what is going wrong.
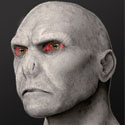
I making Yoda's head from Star Wars, more like the Yoda of Episode II and Episode III. I built a low-poly mesh for his head in Maya, smoothed it out and exported the .obj to Zbrush. Here is the wireframe of the Maya head.
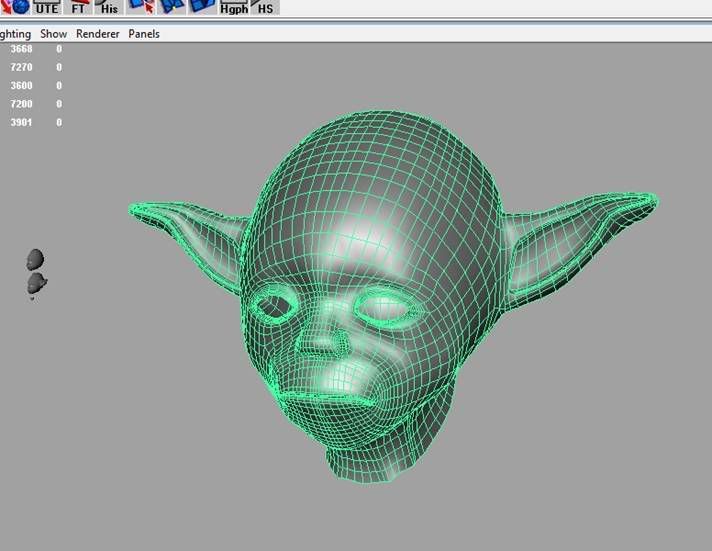
This is what the Zbrush, level 5 final head looks like.
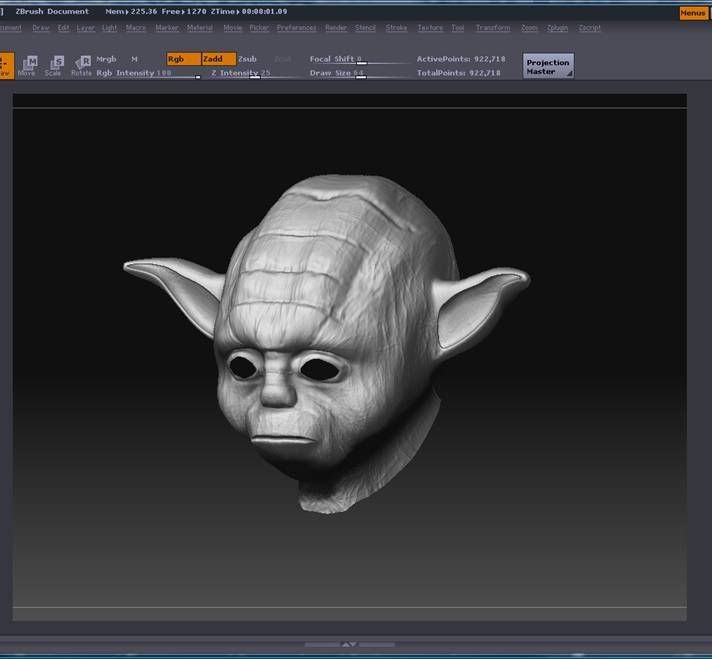
I added the ridges and added some skin-like features. For now, I'm happy with the way he looks. So I put the subdivision level back to 1, switch back to my morph target and hit create displacement map with Adaptive. It creates it and then I export it as a .tif and here is what I get.
To me, it looks fine. I brought it into photoshop and flipped it vertically to make sure the map gets applied correctly.
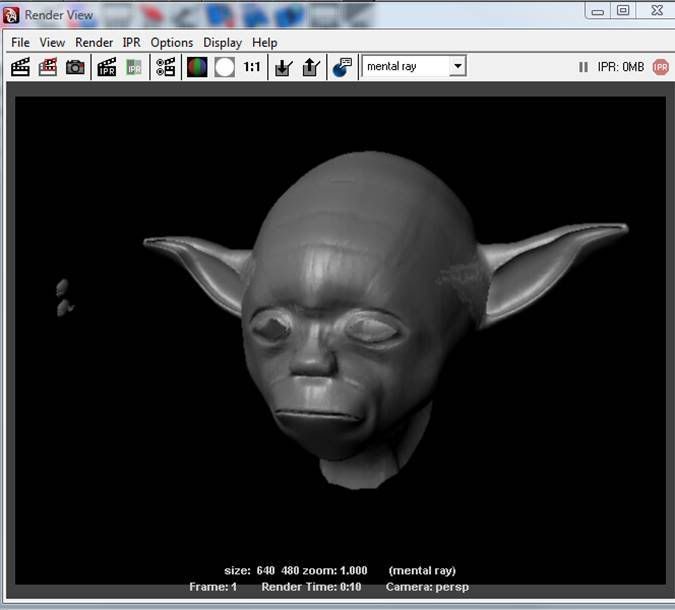
Back in Maya, I want to render it out with Mental Ray. I changed the attribute properties to Spatial, etc. I also unchecked feature displacement for the mesh. I created a blinn with a dsiplacement map and used the file shown above. I also changed one of the values to -0.5 (the correct one). I then tried to render out with Mental Ray and got this
Can anybody help me as to why this isn't working properly? Why am I not getting the wrinkles, the head grooves, etc.? Is there just a setting? Any help is greatly appreciated!
-MiKe