Introduction to Maya - Rendering in Arnold
This course will look at the fundamentals of rendering in Arnold. We'll go through the different light types available, cameras, shaders, Arnold's render settings and finally how to split an image into render passes (AOV's), before we then reassemble it i
# 1 27-11-2003 , 12:36 PM
Registered User
Join Date: Nov 2003
Posts: 7

My first model!!!

This is my first model! user added image user added image user added image

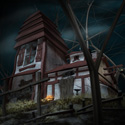
I made it after reading The Hobbit Guy's tutorial and used his ogre (or whatever it is) reference images.

Tell me what you think.

Attached Thumbnails
# 2 27-11-2003 , 12:39 PM
Ra1Der's Avatar
Registered User
Join Date: Nov 2003
Posts: 65
o0o0oh cool! damn dude if thats a first model I may as well give up! eyes need to be narrower though


I am not worthy!
# 3 27-11-2003 , 08:32 PM
Registered User
Join Date: Aug 2003
Posts: 27
looks cool- especially for your 1st model...

# 4 27-11-2003 , 09:46 PM
Registered User
Join Date: Nov 2003
Posts: 7
Thanks, it took me about seven straight hours of modelling.

The eyes were the hardest part, but being a monster I assume they would have to look kinda strange :p

# 5 28-11-2003 , 12:47 AM
Registered User
Join Date: Nov 2003
Posts: 7
Ok I made some changes. Tell me what you think now.

Attached Thumbnails
# 6 28-11-2003 , 06:59 AM
Pony's Avatar
Subscriber
Join Date: Mar 2003
Location: with PonysGirl
Posts: 2,573
chin looks better.. you changed the view so the fine little changes are harder to spot. what did ya do ?

# 7 28-11-2003 , 07:42 PM
ckyuk's Avatar
Subscriber
Join Date: Apr 2003
Location: Great Britain
Posts: 1,336
you are braver than me to start modeling a head as your first model. I've only just started my first organic model and i've been using maya for six months now.

# 8 28-11-2003 , 07:48 PM
neoarcadia's Avatar
Registered User
Join Date: Jul 2003
Posts: 57
Whoa, excellent first model! And you just started? user added image gjob user added image.

I think you could maybe start adding things like veins, wrinkles, sagginess under the eyes.


eat the corn--
# 9 28-11-2003 , 09:10 PM
ckyuk's Avatar
Subscriber
Join Date: Apr 2003
Location: Great Britain
Posts: 1,336
btw if anyone else wants to try this tut it's located here

# 10 28-11-2003 , 09:16 PM
ckyuk's Avatar
Subscriber
Join Date: Apr 2003
Location: Great Britain
Posts: 1,336
and this is what the final piece by the hobbit guy looks like click here

# 11 29-11-2003 , 03:45 AM
Registered User
Join Date: Nov 2003
Posts: 7
More tweaks and playing with ramps user added image

Attached Thumbnails
# 12 29-11-2003 , 08:17 AM
Pony's Avatar
Subscriber
Join Date: Mar 2003
Location: with PonysGirl
Posts: 2,573
looking good.. transitions on your ramps might be to tight. (opinion).. maybe we could see a difrent angle ?

# 13 29-11-2003 , 01:47 PM
Registered User
Join Date: Nov 2003
Posts: 7
Ahh, its impossible...

I'm trying to do some texture mapping but there is nothing I can do to avoid really bad warping. user added image

# 14 29-11-2003 , 03:34 PM
Registered User
Join Date: Jun 2003
Posts: 2
That's a very good first try, but your eyes texture suck a little bit.

Thumps up!

# 15 30-11-2003 , 12:49 AM
Registered User
Join Date: Nov 2003
Posts: 7
Of course the eyes suck, as I said I was just playing with ramps.

Posting Rules Forum Rules
You may not post new threads | You may not post replies | You may not post attachments | You may not edit your posts | BB code is On | Smilies are On | [IMG] code is On | HTML code is Off

Similar Threads