Introduction to Maya - Modeling Fundamentals Vol 2
This course will look in the fundamentals of modeling in Maya with an emphasis on creating good topology. It's aimed at people that have some modeling experience in Maya but are having trouble with
complex objects.
#
1
13-01-2005
, 08:33 PM
Registered User
Join Date: Jan 2005
Join Date: Jan 2005
Posts: 3
avoiding texture distortion (update 01/19/05 )
I'm modeling a bedroom scene in order to show off some bedding patterns. When I model the comforter, sheets, pillows, etc., and then apply the shader, the texture distorts where the vertices have been pushed and pulled. I need the pattern to follow the folds of the bedding without being squished/stretched. Is this a modeling issue or a texturing issue? Can someone point me in the right direction?
Thanks in Advance,
Aaron
Last edited by bonedog; 20-01-2005 at 01:45 AM.
#
2
13-01-2005
, 08:41 PM
"Terminat Bora Diem, Terminal Auctor opus."
#
3
13-01-2005
, 08:54 PM
Registered User
Join Date: Jan 2005
Join Date: Jan 2005
Posts: 3
It is poly model.
I don't know much about UV mapping, but I can see how it would work if you wanted to paint a face on a character, for example. But I've already got a geometric pattern that needs to be placed on a folded and wrinkled bedspread. Would that work? You'll have to pardon my ignorance... I just don't know this stuff.
Thanks,
Aaron
#
4
14-01-2005
, 09:51 AM
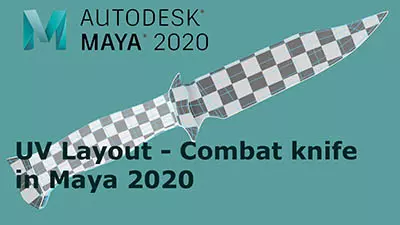
For future reference, before bringing in you texture try applying the Checker shader and note where the checkers are being distorted and begin correct the UVs then.
r/ Michael
AIM: mhcannonDMC
"If you love your job, you'll never work another day in your life."
#
5
20-01-2005
, 01:42 AM
Registered User
Join Date: Jan 2005
Join Date: Jan 2005
Posts: 3
Thanks in Advance
Aaron

#
6
20-01-2005
, 06:47 AM
For now, I recommend you use automatic mapping, in the options dialog, set it for less distortion. This will "unwrap" your bridge model. You'll have more pieces but less texture distortion. Imagine unfolding a box so that you can see all six sides at once, this is essentially what you're going to do the model in order to texture.
If it helps, send me your scene file along and I'll do quick layout of the UVs with sample texture.
E-mail me
AIM: mhcannonDMC
"If you love your job, you'll never work another day in your life."
#
7
21-01-2005
, 06:22 AM
To fix the problem of UVs too close together, try selecting all the UVs and "relaxing" them. You may need to "relax" a couple of times in order to open the spacing up adequately.
As for the curvature, this can be fixed aligning the UVs so that they form straight lines. The final UV map for this will basically be an elongated grid of rectangles (with no curvature).
I'm still learning UV mapping myself and one thing I highly encourage anyone esle learning this is to have a textured view open along with the UV editor so that you can see how editing UVs actually affects the placement of the texture. I've learned a great deal through this experimentation.
AIM: mhcannonDMC
"If you love your job, you'll never work another day in your life."
Posting Rules Forum Rules
Similar Threads
How to put many texture in one scene? Its all change to the one texture
by aonaon20 in forum Maya Materials & Textures replies 3 on 08-03-2014
Texture resolution: a never ending story
by lecra in forum Maya Basics & Newbie Lounge replies 2 on 24-12-2013
Texture not working together with the UV texture editor
by Skalman in forum Maya Materials & Textures replies 4 on 07-06-2013
Help with Tiling and Bump Mapping Brick Texture
by Geemge in forum Maya Basics & Newbie Lounge replies 0 on 19-01-2005
Texture upload
by Protheus in forum Maya Basics & Newbie Lounge replies 9 on 25-01-2004
Topics
Free Courses
Full Courses
VFX News
How computer animation was used 30 years ago to make a Roger Rabbit short
On 2022-07-18 14:30:13
Sneak peek at Houdini 19.5
On 2022-07-18 14:17:59
VFX Breakdown The Man Who Fell To Earth
On 2022-07-15 13:14:36
Resident Evil - Teaser Trailer
On 2022-05-13 13:52:25
New cloud modeling nodes for Bifrost
On 2022-05-02 20:24:13
MPC Showreel 2022
On 2022-04-13 16:02:13


