Introduction to Maya - Modeling Fundamentals Vol 1
This course will look at the fundamentals of modeling in Maya with an emphasis on creating good topology. We'll look at what makes a good model in Maya and why objects are modeled in the way they are.
# 16 21-09-2011 , 06:04 PM
SilverFeather's Avatar
Noober than noob
Join Date: Sep 2011
Posts: 520

UV mapping is typically used to unfold your 3D model so that a 2D texture can be applied. Fur is also a bit like a 2D element (in terms of area) covering your 3D model, so the UVs need to be laid out correctly in this case as well.

It's close to what I wanted, but for some reason, the hair avoids to appear near the ear, despite the facets there being selected. Might need to add 2 kinds of fur to cover those bald spots too, because baldness is at 1000 and density uses up too much render time.

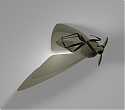
Edit: Decided to use two spheres in the end to position the hair correctly. Result is in the 2nd pic.

Attached Images

Last edited by SilverFeather; 21-09-2011 at 06:39 PM.
# 17 21-09-2011 , 08:53 PM
Registered User
Join Date: Sep 2011
Posts: 55
Probably , you could also have achieved the end result by styling and tweaking the hair properties if you had used the other way as well . Anyways.....whatever satisfies you is good !!

# 18 21-09-2011 , 09:23 PM
SilverFeather's Avatar
Noober than noob
Join Date: Sep 2011
Posts: 520

Probably , you could also have achieved the end result by styling and tweaking the hair properties if you had used the other way as well . Anyways.....whatever satisfies you is good !!

Well now trying with different methods, with a copy of the head scalp it seems to work even better, but i'll have to cover the areas above the ears some other way.
If i'd put the hair directly on the head, it would look too weird at the base of the hairs.

Thank you all for the suggestions and help.
I have another question: Can i change the color of facets (without using the Paint tools) with the use of UV? For example, changing the texture of the lips of the char to a darker pink.
In 3ds max i used to do this easily by applying textures to the selected facets, but Maya might not work that way.

# 19 21-09-2011 , 09:35 PM
daverave's Avatar
The thin red line
Join Date: Aug 2009
Location: England
Posts: 4,472
Yes you can bye selecting the faces then assigne another shader to it but you would get better results with sending your UV snapshot or model to some thing like photoshop, mudbox or zbrush and painting it in there.......dave


Avatar Challenge Winner 2010
# 20 21-09-2011 , 09:47 PM
SilverFeather's Avatar
Noober than noob
Join Date: Sep 2011
Posts: 520

Yes you can bye selecting the faces then assigne another shader to it but you would get better results with sending your UV snapshot or model to some thing like photoshop, mudbox or zbrush and painting it in there.......dave

2nd method sounds complicated, since i don't have photoshop nor any of the other software mentioned. I only have Corel.
And assigning a shader as in another texture? (Assign new material?) Or a new UV map and then new texture with the new material?

# 21 21-09-2011 , 10:40 PM
Registered User
Join Date: Sep 2011
Posts: 55
Probably what daverave means is that you can simply select the polygons/faces you want and apply a new shader onto them. Later change it to the desired colour like pink for lips.


Last edited by simplycreative03; 21-09-2011 at 10:44 PM.
# 22 21-09-2011 , 10:44 PM
SilverFeather's Avatar
Noober than noob
Join Date: Sep 2011
Posts: 520

Probably what daverave means is that you can simply select the polygons/faces you want and apply a new shade onto them. Later change it to the desired colour like pink for lips.

What i don't understand is the meaning of the shade.
What is this shade? Is it a new material? Such as blinn?

# 23 21-09-2011 , 10:47 PM
Registered User
Join Date: Sep 2011
Posts: 55
EDIT : shade = shader : material

# 24 21-09-2011 , 10:52 PM
SilverFeather's Avatar
Noober than noob
Join Date: Sep 2011
Posts: 520

EDIT : shade = shader : material

Thanks. That's what i wanted to know. I hope that will work.

# 25 21-09-2011 , 10:57 PM
Registered User
Join Date: Sep 2011
Posts: 55
your welcome mate !!

# 26 22-09-2011 , 06:39 PM
SilverFeather's Avatar
Noober than noob
Join Date: Sep 2011
Posts: 520
Changing color of the lips worked great and i've learned how to assign materials through the easy menu. Now i'll have to add hair to the eyebrows. I wonder if it will work or i'll have to copy those as well.
This is what i've done so far, but yeah, i'm a noob and still got a lot of improving to do.

Edit: Eyebrows look like furry caterpillars... Maybe i should delete some UVs to shape them.

Attached Images

Last edited by SilverFeather; 22-09-2011 at 10:58 PM.
# 27 26-10-2011 , 06:25 AM
Registered User
Join Date: Oct 2011
Posts: 3
Mapping is often used to carry out the three-dimensional model can be applied to your 2D texture. Fur is a bit like your 2D elements in 3D models..

# 28 26-10-2011 , 12:28 PM
SilverFeather's Avatar
Noober than noob
Join Date: Sep 2011
Posts: 520

Mapping is often used to carry out the three-dimensional model can be applied to your 2D texture. Fur is a bit like your 2D elements in 3D models..

Thanks for the reply. Well, i've fixed that problem with the fur a while ago.
Now i'm having other problems with clothing the character. Thinking of resorting to rigging and Dynamics instead of nDynamics for clothing deformation. nCloth runs slow as hell, even with caching. -_-

Posting Rules Forum Rules
You may not post new threads | You may not post replies | You may not post attachments | You may not edit your posts | BB code is On | Smilies are On | [IMG] code is On | HTML code is Off

Similar Threads