Complex UV Layout in Maya
Over the last couple of years UV layout in Maya has changed for the better. In this course we're going to be taking a look at some of those changes as we UV map an entire character
# 1 18-08-2005 , 10:24 AM
Subscriber
Join Date: Jan 2003
Location: England
Posts: 13

ferrari tutorial w.i.p.

Hiya,

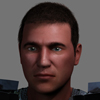
I've started doing the ferrari 360 tutorial, here is the result so far, let me know what you think user added image

I've noticed that the HDRI lighting image seems to be stretched, though I used the same one as the tutorial (which I found on google) ... any ideas how to fix this?

cheers,

James

Attached Thumbnails
# 2 18-08-2005 , 05:20 PM
sspikedudley's Avatar
Subscriber
Join Date: Jun 2004
Location: Nottingham
Posts: 344
yep I agreee that the image I used was a bit on the crap side, Although at the time that was the best I could do the alternative as I used fo the final render is to go out with a camera use the highest resolution it can and take photos 360 degrees around you, then tak these into photo shop and manually put them together although it doesn't have to be anything like a masterpiece, just try your best to get stuff aligned and blur the edges then you should have a very wide panoramic image which you then need to turn into an HRD image (look on google for tuts) then simply drop it in place of your image you have at the moment Hope you enjoyed the tut

# 3 19-08-2005 , 03:22 PM
Subscriber
Join Date: Jan 2003
Location: England
Posts: 13
Hi, thanks for the reply. Great tutorial by the way user added image Very helpful, some good tips and I can see how they would apply to other cars too.

Yep after looking at HDRShop, I think I will have a go at making some spherical and panaromic hdri photos, (when the weathers good tho user added image lol) looks like fun.

I was wondering how good the image i've done looked so far, if anyone has any comments or crits, that would be cool.

I think the HDR used produces some nice lighting generally and on the door (aside from the strechyness of the specular on the nearside front corner and the windscreen) what do you guys think?

I've tried using some other larger HDR images, though they produced fairly low lighting results (dark, but quite realistic). Also tried the lightgen plugin to correct this, tho that is super slow render, and seems to come out too cartoon like at the moment.

From looking at the maya manual it recommends using the IBL node, which I had a go with too, though this doesn't seem to add any control over brightness, but it says its good for this user added image

If anyone is intersted in some slighlty clearer blueprints for this car i found some here:

https://blueprints.onnovanbraam.com/b.../cars/ferrari/

cheers,

James

# 4 19-08-2005 , 04:33 PM
sspikedudley's Avatar
Subscriber
Join Date: Jun 2004
Location: Nottingham
Posts: 344
one thing I would suggest you look for is a 3 point light setup tutorial as this is what I use almost everytime now, you have full control over brightness, shading and things like lighting colour and this is what gives realistic results. I would also suggest you use A larger HRD image with the above setup but instead of setting the image to the ambient channel set it to the colour channel and turn final gather off and hopefully this will return better results

# 5 19-08-2005 , 05:17 PM
Minstrel's Avatar
Subscriber
Join Date: Nov 2002
Location: Made in Spain
Posts: 422
Even with an HDRI lighting/FG set up you can still use regular lights if you still need it. There are other ways to increase the light generated by the HDR image though, you should look at at (i.e. make the color of the material where you mapped the HDRI image whiter). The one HDR image I have is 18M in size, just to give you an idea of a quality HDR image. I have looked on the web for some, but I can't seem to find any (for free) that are anywhere near the quality of the one I have


The car looks very good.

# 6 21-08-2005 , 03:26 PM
Subscriber
Join Date: Aug 2004
Posts: 515
-side view mirrors needed
-the hood lines aren't straight
-no car has a black windshield :blush:
-that small side vent in the front bumper looks like it needs to become a bit sharper


First year 3D Grad
# 7 23-08-2005 , 10:20 AM
Subscriber
Join Date: Jan 2003
Location: England
Posts: 13
Hi, thanks for the replies.

sspikedudley: yes I think your right I should look at more lighting tutorials. I know the basic 3 point lighting set up, but probly need to work on the whole thing generally. It's interesting you say you use mostly 3 point lighting though, I will try messing around with some of those user added image . Does anyone ever use the IBL node or the incandesence channel? I'm just wondering cos the manual mentions it, though you suggest the ambient so I guess you must have tried all those and found ambient the best.

minstrel: thanks I'm glad you like it so far user added image it's good to know wether the overall effect is good or bad. 18MB wow sounds like a massive file. What HDR's would you recommend if i were to buy some?

turbodan: yes I agree with all those. The black windscreen is really to hide the empty inside until i can find some blueprints of the inside of this car lol user added image If anyone knows where i could find those that would really help. I'm interested you mention the hood lines, cud you indicate which part? I assume you mean the edges are not properly smooth curves, I will take a good look at it. Though I'm wondering if this may be the effect of the stretchy HDR image.

cheers,

James

Posting Rules Forum Rules
You may not post new threads | You may not post replies | You may not post attachments | You may not edit your posts | BB code is On | Smilies are On | [IMG] code is On | HTML code is Off

Similar Threads