Maya for 3D Printing - Rapid Prototyping
In this course we're going to look at something a little different, creating technically accurate 3D printed parts.
#
1
16-09-2011
, 11:11 AM
Headus UVLayout
I would like to ask you to help me with this program; if I´m done with UV's what I need to do next??except of saving it into .obj file...
Thanks
#
2
16-09-2011
, 06:38 PM
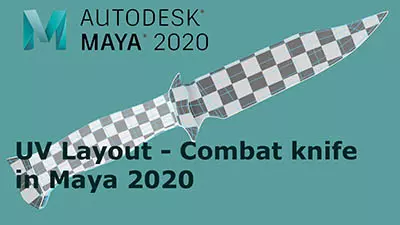
The basic workflow is to save your model in Maya to .obj then open it in Headus UV and unwrap.If you want use symmetry you can use the Symmetry
tool to speed up cut'n'weld operations. Click on the Find button, then
LMB click on any edge that sits on the mirror line (i.e. the line that
divides the two symmetrical halves), then tap the space bar to continue;
if all goes well, the left half of the mesh will be shaded darker than the
right, indicating that symmetry editing is now active; non-symmetrical polys are shaded yellow.
Editing goes along these lines ...
in the Display view the Ed will be selected
hit C to cut ,define the cuts then shift S
Hit D to drop it to UV space
Go to Display on UI and select UV on the view tab
HIT shift F to flaten after a while hit spacebar
to go back to editing mode hit shift D and select Ed on the view tab of the UI
repeat for remaining pieces if you have any.
Other commands : backspace will unselect edges.
shift LMB to rotate
spacebar LMB to rotate
spacebar MMB to move
ctrl MMB drag to move UV's
hot S to do symmetry
C to cut
W to weld
in 3d mode hit T to see textures
Once you have the U.V's completed you Save .
Now load the saved .obj back into Maya and you are done.If you want you can now save the newly UV'ed model in Maya as an .mb or leave as an .obj if you need to take it into Zbrush or 3Dpaint or something .
If you want to create you own textures then select your model and bring up the UV Texture editor, simply click on UV snapshot on the menu and save your UV layout in the size you want your textures.Now you can load the snapshot into Photoshop and using either multiply or screen as your blend mode (depending on layer position)paint away and create any texture,bump,reflection or specularity ect maps you need.

2 x Modeling Challenge Winner
Last edited by jsprogg; 16-09-2011 at 07:19 PM.
#
3
16-09-2011
, 07:27 PM
Thanks jsprogg!Once you have the U.V's completed you Save .
Now load the saved .obj back into Maya and you are done.If you want you can now save the newly UV'ed model in Maya as an .mb or leave as an .obj if you need to take it into Zbrush or 3Dpaint or something .
If you want to create you own textures then select your model and bring up the UV Texture editor, simply click on UV snapshot on the menu and save your UV layout in the size you want your textures.Now you can load the snapshot into Photoshop and using either multiply or screen as your blend mode (depending on layer position)paint away and create any texture,bump,reflection or specularity ect maps you need.
That's the exactly what I was looking for.
Creck
Posting Rules Forum Rules
Similar Threads
Headus UV Layout back to Maya 2015
by sampson01 in forum Maya Materials & Textures replies 2 on 21-06-2015
HeadUS UV Problems
by mythandra in forum Work In Progress replies 6 on 29-03-2015
UVLayout trouble
by PierreLeSang in forum Maya Basics & Newbie Lounge replies 6 on 13-02-2015
Bake Multi UV Tile Textures
by Thomas-Penner in forum Maya Materials & Textures replies 0 on 29-01-2015
Topics
Free Courses
Full Courses
VFX News
How computer animation was used 30 years ago to make a Roger Rabbit short
On 2022-07-18 14:30:13
Sneak peek at Houdini 19.5
On 2022-07-18 14:17:59
VFX Breakdown The Man Who Fell To Earth
On 2022-07-15 13:14:36
Resident Evil - Teaser Trailer
On 2022-05-13 13:52:25
New cloud modeling nodes for Bifrost
On 2022-05-02 20:24:13
MPC Showreel 2022
On 2022-04-13 16:02:13


