 . what do you think???
Substance Painter
In this start to finish texturing project within Substance Painter we cover all the techniques you need to texture the robot character.
#
106
13-07-2003
, 08:07 PM
 . what do you think???
It's Dr. Know, Not Darknow
#
107
13-07-2003
, 08:11 PM
It's Dr. Know, Not Darknow
#
108
13-07-2003
, 09:53 PM
Registered User
Join Date: Jun 2003
Join Date: Jun 2003
Posts: 88
[oh yea, love the skull on the eye patch, very bad ass]
#
109
14-07-2003
, 03:24 AM
Registered User
Join Date: Jul 2003
Join Date: Jul 2003
Posts: 34
 ...Then maybe i won't be

Nice work on the Poo Slingin monkey... I can't give much C&C but maybe mr. hankey could have a mini poo launcher or somethin that he could like shoot lil chunks of corn or other lil things we digest maybe some peas... or even mini poo, anyways good luck with the challenge
#
110
14-07-2003
, 03:27 AM
 . Good job!
"I should call you sugar maple tree cause i'd totally tap that" haha
email - mattwettstein@gmail.com
#
111
14-07-2003
, 03:50 AM
cgrindo - uhhh.....I think im gonna barf. Good idea though. I will consider it, but if I do it it will be towards the end. By the way, I am a major newbie, and this is my best work yet. Just stick with it. It just kinda comes along.
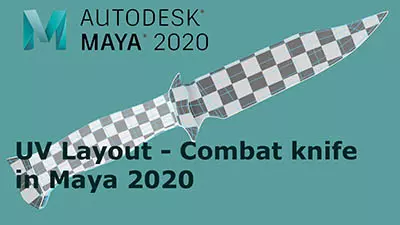
M - Well, I played around with the uv texture editor for about an hour and finally I just planar mapped it. Here is the uv layout...
It's Dr. Know, Not Darknow
#
112
14-07-2003
, 04:06 AM
"I should call you sugar maple tree cause i'd totally tap that" haha
email - mattwettstein@gmail.com
#
113
14-07-2003
, 04:33 AM
It's Dr. Know, Not Darknow
#
114
14-07-2003
, 02:58 PM
It's Dr. Know, Not Darknow
#
115
14-07-2003
, 03:00 PM
It's Dr. Know, Not Darknow
#
116
14-07-2003
, 09:14 PM
Registered User
Join Date: Jul 2003
Join Date: Jul 2003
Posts: 34
 lol Good Luck
#
117
15-07-2003
, 06:21 AM


It's Dr. Know, Not Darknow
#
118
15-07-2003
, 06:34 AM
Guest
Posts: n/a
#
119
15-07-2003
, 04:38 PM
It's Dr. Know, Not Darknow
#
120
15-07-2003
, 05:36 PM
good job man ,can't wait to see it all toghter.

Posting Rules Forum Rules
Similar Threads
August Challenge - DrKnow - Noobie
by drknow in forum Previous Challenges (Archives) replies 24 on 08-08-2003
July Challenge - KILLER BEE- Noobie
by killerBee in forum Previous Challenges (Archives) replies 25 on 31-07-2003
July challenge - karen - noobie
by karen in forum Previous Challenges (Archives) replies 23 on 29-07-2003
July Challenge - lgessoni - Noobie
by lgessoni in forum Previous Challenges (Archives) replies 28 on 22-07-2003
July Challenge - Traiven3d - Noobie
by Traiven3d in forum Previous Challenges (Archives) replies 20 on 17-07-2003
Topics
ORDER AUTHENTIC 100% REGISTERED IELTS,TOEFL,DIPLOMAS,(WATSAP(+27838808170)B2
By marie121
Maya Basics & Newbie Lounge
0
I want to join brotherhood occult for office promotion in Aba +2348166580486
By Zedichorah80
Maya Modeling
1
0
★†★+2348166580486★†★ How can I join secret illuminati occult in Anambra state★†★
By Zedichorah80
Board Questions & Suggestions
0
Free Courses
Full Courses
VFX News
How computer animation was used 30 years ago to make a Roger Rabbit short
On 2022-07-18 14:30:13
Sneak peek at Houdini 19.5
On 2022-07-18 14:17:59
VFX Breakdown The Man Who Fell To Earth
On 2022-07-15 13:14:36
Resident Evil - Teaser Trailer
On 2022-05-13 13:52:25
New cloud modeling nodes for Bifrost
On 2022-05-02 20:24:13
MPC Showreel 2022
On 2022-04-13 16:02:13


