Introduction to Maya - Rendering in Arnold
This course will look at the fundamentals of rendering in Arnold. We'll go through the different light types available, cameras, shaders, Arnold's render settings and finally how to split an image into render passes (AOV's), before we then reassemble it i
# 1 19-08-2011 , 01:23 AM
stevejp's Avatar
Subscriber
Join Date: Mar 2011
Posts: 70

Army Surplus Special

Hi
This my first post here and you all seem like a friendly bunch so I thought I would see what comment, thoughts and suggestions you would have on the stuff I am doing.
I am doing an evening course in Maya which I have been doing for the last 6 months, so still very much a newbie to it with a LOAD of questions!

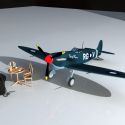
Along with the course work I am doing my own projects, this is one of them: The Wacky Races Army Surplus Special. I have been trying to keep it as close to the cartoon version as possible with the main exception being the tracks
which i am having a few issues with, as in trying fit them evenly around the wheels and animate them.
There is still a few bits of modelling to do but I wanted to see what it would look like in colour so I have given it a quick texture.

I look forward hearing any thought or comment you may have, no matter how harsh!
Cheers
Steve
user added image

Attached Thumbnails
# 2 19-08-2011 , 05:28 AM
bullet1968's Avatar
Lifetime Member
Join Date: Feb 2010
Location: Australia
Posts: 4,255
BAHAHAHAH what a cool model man!!! I remember the wavky Races. Looks good thus far mate!


bullet1968

"A Darkness at Sethanon", a book I aspire to model some of the charcters and scenes
# 3 19-08-2011 , 07:13 AM
CGWolfgang's Avatar
Subscriber
Join Date: Feb 2009
Location: Hawaii
Posts: 224
I agree with bullet it looks good! What kind of render are you going to try with it? Toon, photoreal, somewhere in between?

Welcome to the forums!


~To create a new world through the imagination
# 4 19-08-2011 , 11:26 AM
stevejp's Avatar
Subscriber
Join Date: Mar 2011
Posts: 70
Thanks guys. Yep The Wacky races was my fave growing up... as for the render I think somewhere in between. but that may change!

# 5 19-08-2011 , 11:33 AM
stevejp's Avatar
Subscriber
Join Date: Mar 2011
Posts: 70
a quick render of an earlier version (different track/wheels)
cheers

Attached Thumbnails
# 6 20-08-2011 , 02:30 AM
ctbram's Avatar
Moderator
Join Date: Jan 2004
Location: Michigan, USA
Posts: 2,998
I like it a lot! very nice model.

For the tracks you can use sections the cylinders used as the drive and bogie wheels that are at the tension points cut them at the tangents, combine them, and finally use the bridge tools to connect up the sections. I will see if I can put a video together for you.

Animating the track is a whole nother can o'worms though and I am the right guy to suggest how to best do that.

Rick


"If I have seen further it is by standing on the shoulders of giants." Sir Isaac Newton, 1675

Last edited by ctbram; 20-08-2011 at 12:49 PM.
# 7 20-08-2011 , 03:12 AM
Acid44
Guest
Posts: n/a
This looks awesome man, never saw the cartoon though

# 8 29-08-2011 , 12:45 AM
stevejp's Avatar
Subscriber
Join Date: Mar 2011
Posts: 70
Thanks guys
Acid... not seen Wacky Races oh dear!!! lol Must admit not seen it for years so it could be crap! I don't want to spoil my childhood memories...

Thanks ctbram. I will give that a go and show you how i get on. That would be awesome if you could do a video, if you got time that would be brilliant.

And yeah I have found out about that animation can of worms!!! Found a few tutorials that show track animation but not any on how to get them to the usual things that tracks can do, as in start, speed up, slowdown, stop and go backwards etc. And i guess i will need two separate sets of tracks so they can work independently for each other. and do you have master ones that run duplicates...AHHHH!

I would love to get tank popping wheelies etc, doing that real cartoon stuff. I am sure its very simple when you know how. or maybe it is just mind blowingly complex!!
maybe down the track (bad pun!) user added image lol I will be able to do it!
thanks for you help
Steve

# 9 29-08-2011 , 10:40 PM
KartoonHead's Avatar
Subscriber
Join Date: May 2011
Posts: 39
Haha! I absolutely love this. The Surplus Special was always one of my favourite wacky racers.

Just wondering, and this is basic stuff which I really should know now that I've been using Maya for a couple of months, but how did you render the model on that nice white shiney floor? It looks like a really nice way to present a model, far better than showing a floating model on a black background. I've looked for tutorials and lessons on presenting a nice looking render but I really don't know what to look for or even how to word it (as you've just found out!), so how is it done (if you don't mind me asking)?

Also; if you've got access to a 3D printer you need to get that thing made! I'd love one of those on my desk XD

# 10 30-08-2011 , 01:46 AM
stevejp's Avatar
Subscriber
Join Date: Mar 2011
Posts: 70
Hi KartoonHead pleased you like it! And yeah it would look cool sitting on my desk also but I would need to clear a space first!!! user added image , I need to model Sarge and private to make it complete! I should check out 3D printing but I think the model may need a lot more finishing off to get it ready. Hey maybe a new thread?

As for the render, I am sure there are a load of ways to get this effect but this is how I do it.

Load a plane for the object to sit on, add a blinn to it and change the colour white. You can dial the reflectivity up and down as you want in the blinn attribute panel. Then add a directional light ( position how you want).

Now add a new camera and position that how you want. In the camera attribute panel go to the environment tab and change the background colour to white.

Now in the render settings make sure you are using mental ray, set the quality to production and under the indirect lighting tab turn the final gathering on. I just leave the setting as they are ( i don't understand that stuff yet)!!
When you render you image make sure you are rendering from the new camera. You can do this by either changing it in the render setting menu under renderable camera, or in the render view- under render- render- then select the camera from the drop down menu.

Hope this is making sense!??
You may need to turn down the intensity of the directional light, i usually turn mine down to about .4

There ya go! as I said I hope that makes sense if not let me know.

Cheers
Steve

# 11 05-09-2011 , 06:00 PM
KartoonHead's Avatar
Subscriber
Join Date: May 2011
Posts: 39
Having a bit of an issue with Mental Ray :'(

Switching on 'final gathering' turns off reflections for some reason. Without final gathering on my reflective floor is perfect, then I turn final gathering on and the model is rendered nicely, shadows and all, but there are no reflections. Any idea why this might be?

Martin.

EDIT: Got it! I don't know what exactly it was that fixed it, but the things I remember doing were; turned on reflection blurring or something in the Blinn material, enabled ambient occlusion in the rendering settings, changed the directional light's attributes, told it to override maya shaders or something. Basically went on a box ticking/unticking spree to see what happened and now it works user added image


Last edited by KartoonHead; 05-09-2011 at 09:18 PM.
# 12 17-08-2012 , 03:04 AM
stevejp's Avatar
Subscriber
Join Date: Mar 2011
Posts: 70
Finally got to do the tracks, following ctbrams tutorial. Thanks it was a great help. the tracks fit the wheels now... which is always a good thing!!! Still trying to keep as close as I can to the original but I have curved the 'treads' on the track, they are straight on the cartoon, but this just looked odd on the model.

I think the model is nearly there, I am not going to animate it as I originally thought .... too hard basket!!! lol
just going to pose it 'Wacky race style', maybe popping a wheelie or something, but I am going to model Sarg and private.

Attached Thumbnails
# 13 17-08-2012 , 12:56 PM
daverave's Avatar
The thin red line
Join Date: Aug 2009
Location: England
Posts: 4,472


Avatar Challenge Winner 2010
# 14 17-08-2012 , 03:38 PM
ctbram's Avatar
Moderator
Join Date: Jan 2004
Location: Michigan, USA
Posts: 2,998
The problem with that method dave is it deforms the geo. You know what would be a good solution?

FOR THE DAMN ANIMATION PATH TO WORK WITHOUT FLIPPING THE GEO.

You know like it does in modo, max, c4d....

And I really love when I go to you tube and see 50 examples of animated tracks in maya with absolutely no description of how they did it. Like hey look I figured this out! Now I am going to keep it a secret!


"If I have seen further it is by standing on the shoulders of giants." Sir Isaac Newton, 1675

Last edited by ctbram; 17-08-2012 at 03:40 PM.
# 15 17-08-2012 , 03:44 PM
daverave's Avatar
The thin red line
Join Date: Aug 2009
Location: England
Posts: 4,472
Rick I know how they do that each track part has a motion path on the same curve but offset, and I think I have a motion path setup that does not flip in most case..............dave

See setting for motion path vector up

Attached Thumbnails


Avatar Challenge Winner 2010

Last edited by daverave; 17-08-2012 at 04:05 PM.
Posting Rules Forum Rules
You may not post new threads | You may not post replies | You may not post attachments | You may not edit your posts | BB code is On | Smilies are On | [IMG] code is On | HTML code is Off

Similar Threads