Integrating 3D models with photography
Interested in integrating your 3D work with the real world? This might help
#
16
23-10-2006
, 01:36 AM

Registered User
Join Date: Jun 2004
Join Date: Jun 2004
Location: Cleveland, Ohio (USA)
Posts: 1,541
start with the key light (the light you have currently), and that's the brightest light you should have.
now, add a fill light on the opposite side of the key light, in the same position. the intesity of this light should be about 3/4 of your key light.
and lastly the backlight. it's a light that's in the same position (or maybe a little lower than your key and fill) but has about the same or less intensity as your fill, and is directly behind the subject.
keep in mind that the 3-point lighting method works best when the 3 lights are set in accordance to your rendering camera, not your model. if you set up the 3 lights and then change the camera angle, you can still get poor lighting. best way around this is to parent the lights to your camera... be aware this setup is only really recommended for showcasing a model, and not really for a scene.
another way to avoid the clay render but get a decent outcome is to render with mental ray... make a nurbs box, delete 3 of the 6 sides (top and two adjacent sides) and use this kinda like a display case you put your model into. open the active camera's attribute editor, and under environment change your background color to white (using hsv, i have simple values of 0,0,2). in render globals (settings, whatever) uncheck use default light at the bottom of the maya common options. under mental ray, enable final gather, and up your final gather rays to about 1000. give that a render, it should turn out pretty well... but rendering larger than 640X480 might take a little while... like a minute or four, depending on the speed of your computer and amount of ram.
Accept no substitutions.
#
17
23-10-2006
, 01:38 AM

Registered User
Join Date: Oct 2006
Join Date: Oct 2006
Location: Florida
Posts: 73


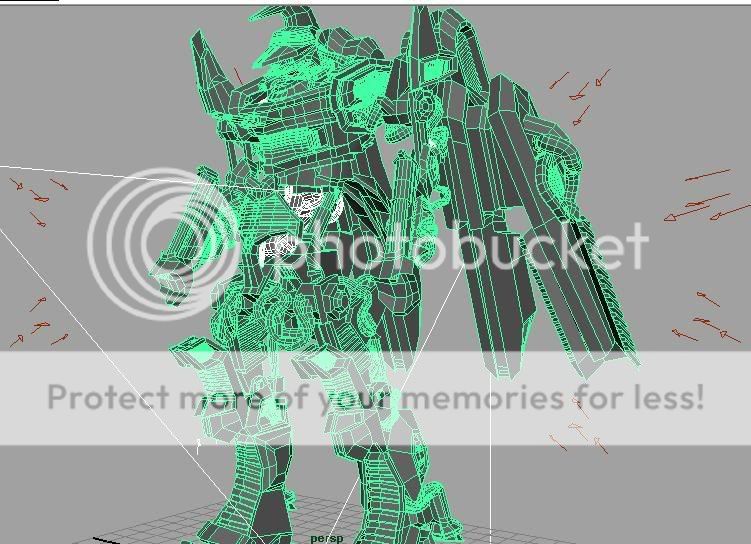
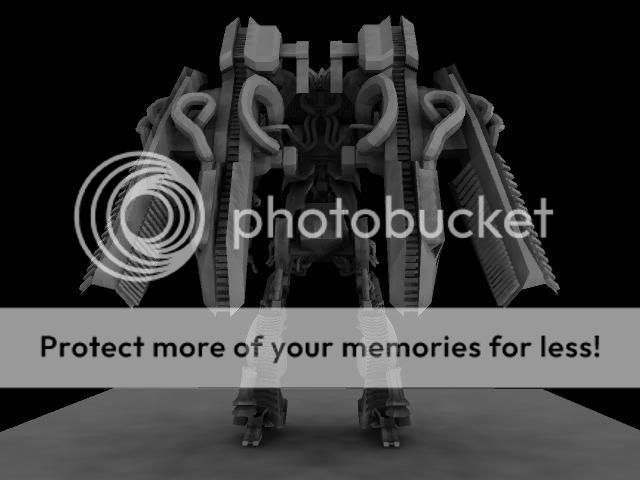
here is a wire frame that i jsut threw in... i only combined the items together for now for a quick mirror.. but it should give you a idea about how the wire frame is layed out... i have some "cleaning up to do in some areas" Enjoy !!!
:p
Just make it work
www.createdestroy.net/kcin
#
18
23-10-2006
, 01:48 AM
Registered User
Join Date: Jun 2004
Join Date: Jun 2004
Location: Cleveland, Ohio (USA)
Posts: 1,541
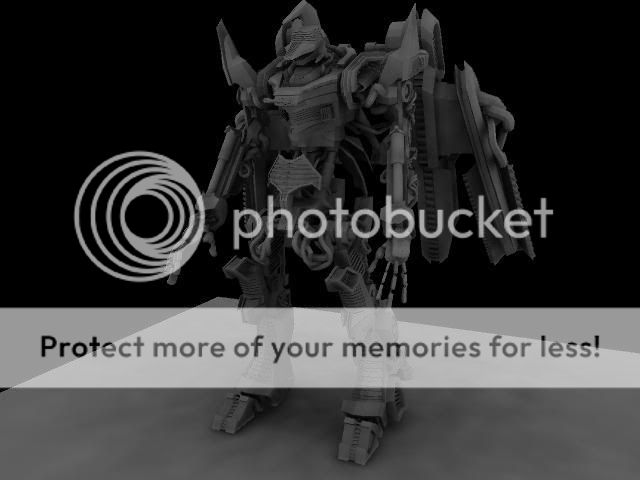
i'd still recommend the second method i described *shrug*
(the quick and dirty way of getting the 'clay render' look is to select your objects you want clay rendered, drop them into a render layer, then pick the 'ambient occlusion' preset and render to mental ray. i've been toying with how to get this to be not as bleached out, but really to no avail.)
Accept no substitutions.
#
19
23-10-2006
, 01:52 AM
Registered User
Join Date: Oct 2006
Join Date: Oct 2006
Location: Florida
Posts: 73
Just make it work
www.createdestroy.net/kcin
#
20
23-10-2006
, 01:58 AM
Registered User
Join Date: Jun 2004
Join Date: Jun 2004
Location: Cleveland, Ohio (USA)
Posts: 1,541
Accept no substitutions.
#
21
23-10-2006
, 02:02 AM
Registered User
Join Date: Oct 2006
Join Date: Oct 2006
Location: Florida
Posts: 73
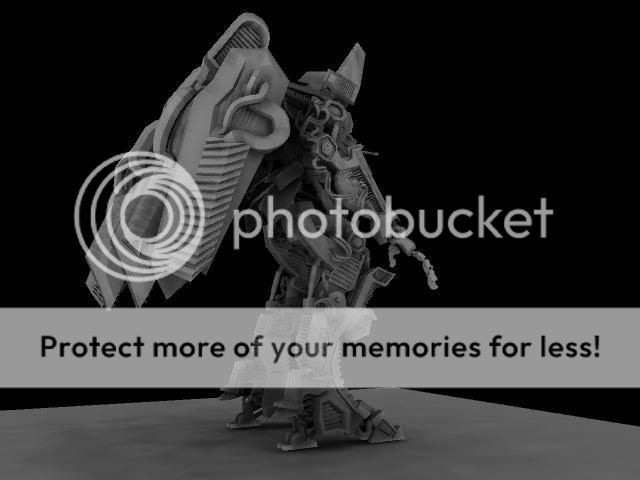
does this look better?

Just make it work
www.createdestroy.net/kcin
#
22
23-10-2006
, 02:23 AM
Registered User
Join Date: Jun 2006
Join Date: Jun 2006
Location: Washington D.C
Posts: 620
"The reasonable man adapts himself to the world; the unreasonable one persists in trying to adapt the world to himself. Therefore all progress depends on the unreasonable man."
George Bernard Shaw - Man and Superman
#
23
23-10-2006
, 03:10 AM
Registered User
Join Date: Jun 2004
Join Date: Jun 2004
Location: Cleveland, Ohio (USA)
Posts: 1,541
Accept no substitutions.
#
24
23-10-2006
, 08:15 AM
Registered User
Join Date: Oct 2006
Join Date: Oct 2006
Location: Florida
Posts: 73


Just make it work
www.createdestroy.net/kcin
#
25
24-10-2006
, 03:55 AM
Registered User
Join Date: Jun 2006
Join Date: Jun 2006
Location: Washington D.C
Posts: 620
"The reasonable man adapts himself to the world; the unreasonable one persists in trying to adapt the world to himself. Therefore all progress depends on the unreasonable man."
George Bernard Shaw - Man and Superman
#
26
24-10-2006
, 05:03 AM
Registered User
Join Date: Nov 2005
Join Date: Nov 2005
Posts: 10
#
27
24-10-2006
, 06:25 AM
Guest
Posts: n/a
:bow: good work!!:bow:
#
28
24-10-2006
, 12:59 PM

Registered User
Join Date: May 2006
Join Date: May 2006
Posts: 79
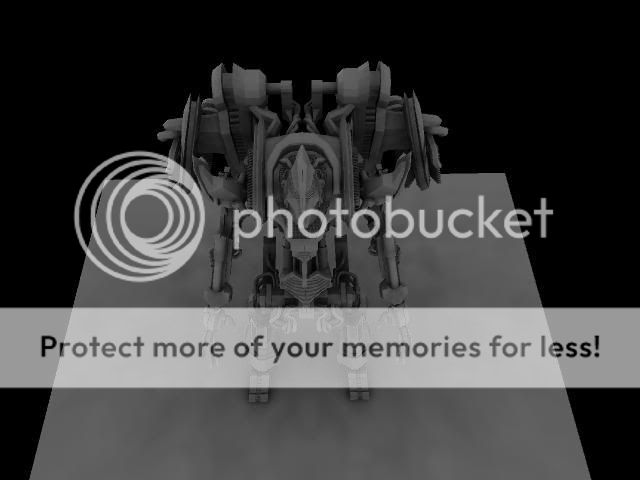
I like the shape very much! ... especially that "ripples" on the legs...
what are u going to do with this mech? put him in some kind of scene or animate him?
#
29
24-10-2006
, 01:34 PM
Subscriber
Join Date: May 2006
Join Date: May 2006
Location: coventry, england
Posts: 191
https://video.google.co.uk/videoplay?...=maya+lighting
3 point lighting set up video. love the mech btw very scarey
I love maya
#
30
24-10-2006
, 02:02 PM
Registered User
Join Date: Oct 2006
Join Date: Oct 2006
Location: Florida
Posts: 73
Just make it work
www.createdestroy.net/kcin
Posting Rules Forum Rules
Similar Threads
MAYA 14 won't start anymore
by alex394 in forum Maya Technical Issues replies 1 on 07-05-2014
cant start doc server
by ghDude in forum Maya Technical Issues replies 0 on 05-06-2005
Where To Start....
by robinmthomas in forum Maya Basics & Newbie Lounge replies 3 on 26-10-2002
how to start learning maya?
by Chester in forum Maya Basics & Newbie Lounge replies 51 on 24-09-2002
First post
by NoTalent in forum Work In Progress replies 2 on 20-09-2002
Topics


Free Courses


Full Courses


VFX News
How computer animation was used 30 years ago to make a Roger Rabbit short
On 2022-07-18 14:30:13
Sneak peek at Houdini 19.5
On 2022-07-18 14:17:59
VFX Breakdown The Man Who Fell To Earth
On 2022-07-15 13:14:36
Resident Evil - Teaser Trailer
On 2022-05-13 13:52:25
New cloud modeling nodes for Bifrost
On 2022-05-02 20:24:13
MPC Showreel 2022
On 2022-04-13 16:02:13