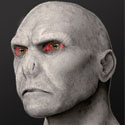
Digital humans the art of the digital double
Ever wanted to know how digital doubles are created in the movie industry? This course will give you an insight into how it's done.
#
1
15-10-2007
, 03:25 PM
Maya and ZBrush displacement maps
can I adjust the maya displacement map so that it works from 50% grey rather than black (so I can have some negative displacement too?) or have I got to somehow get the base colour for the displacement map from zbrush to be black?
#
2
15-10-2007
, 03:40 PM
Oh and on Pixologics site theres also tutorials there too using the Displacment exproter and then setting in maya etc etc
Hope it helps
"No pressure, no diamonds" Thomas Carlyle
#
3
15-10-2007
, 03:48 PM
Edward: this is the easiest and effective way to do it.
the other settings would be to make sure that make sure feature displacement for the mesh is OFF in the Attribute Editor, make sure you have a subdivison approximation node for the mesh, then in the AE for it make sure the subdivision surface quality is set to spatial and the settings for the min is 3.
that should cover it.....
happy rendering............
Jay
#
4
15-10-2007
, 03:52 PM
Registered User
Join Date: Jun 2004
Join Date: Jun 2004
Location: Romania
Posts: 27

#
5
15-10-2007
, 10:44 PM
The map I have is just a basic one made using the displacement thing in the tools menu... I'm new to zbrush, so I can't say more than that.
anyway, here's the result of my work
 the treetrunk was formerly very smooth, but now has nice displacement lumps and detail. The leaves still need work, I have some odd corners that shouldn't be there if anyone has any iedea where they come from?
#
6
15-10-2007
, 10:58 PM
It might be the edges of the map, Z allows you to extend the border if you use the multi displacement exporter
"No pressure, no diamonds" Thomas Carlyle
#
7
15-10-2007
, 11:08 PM
#
8
15-10-2007
, 11:31 PM
https://www.edwin3design.com/root/news.htm
good luck
nice tree btw

#
9
17-10-2007
, 10:56 AM
Registered User
Join Date: Jun 2004
Join Date: Jun 2004
Location: Romania
Posts: 27
#
10
18-10-2007
, 08:50 AM
Posting Rules Forum Rules
Similar Threads
maya vs zbrush
by wendy3112 in forum Maya Basics & Newbie Lounge replies 1 on 18-07-2016
Zbrush displacement issues
by Rhetoric Camel in forum Maya Basics & Newbie Lounge replies 7 on 12-04-2009
zbrush and displacement maps.
by arran in forum Maya Basics & Newbie Lounge replies 3 on 11-04-2009
Maya 2009 zbrush displacement maps
by Anhslaught in forum Maya Basics & Newbie Lounge replies 7 on 25-12-2008
Zbrush Displacement to Maya Problems
by shmey2 in forum Maya Basics & Newbie Lounge replies 1 on 20-03-2008
Topics
New tutorial - Create tileable textures from photos. Photoshop to Alchemist to Maya 2
By David
Site News & Announcements
5
Free Courses
Full Courses
VFX News
How computer animation was used 30 years ago to make a Roger Rabbit short
On 2022-07-18 14:30:13
Sneak peek at Houdini 19.5
On 2022-07-18 14:17:59
VFX Breakdown The Man Who Fell To Earth
On 2022-07-15 13:14:36
Resident Evil - Teaser Trailer
On 2022-05-13 13:52:25
New cloud modeling nodes for Bifrost
On 2022-05-02 20:24:13
MPC Showreel 2022
On 2022-04-13 16:02:13


