Beer glass scene creation
This course contains a little bit of everything with modeling, UVing, texturing and dynamics in Maya, as well as compositing multilayered EXR's in Photoshop.
#
1
14-06-2009
, 12:14 PM
Registered User
Join Date: May 2009
Join Date: May 2009
Posts: 2
Maya Tutorial Needed
can anyone pls guide me on how to model one or can you forward me to a tutorial
thanks in advance
nidagal
#
2
14-06-2009
, 02:35 PM
here u go!!

This pics r numbered so follow them as ordered!
1. Go to side view.
Create>Cp Curve tool(Reset the tool OR make sure that the Cp curve settings is 3 cubic)
Then draw a curve like the pic.I like to have four points at the rounded parts.It helps me to have a better control.
Then move the pivot pt of the curve at grid.(Snap it to the grid. So u can revolve that with respect to that grid).
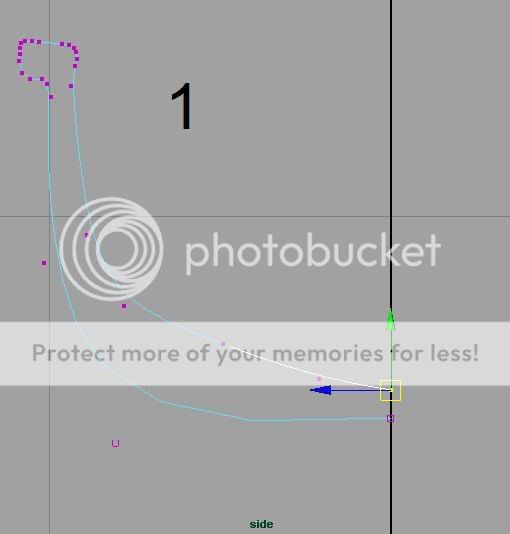
2. Then go to SURFACE menu.
Surface > Revolve(make sure to set the setting as default)
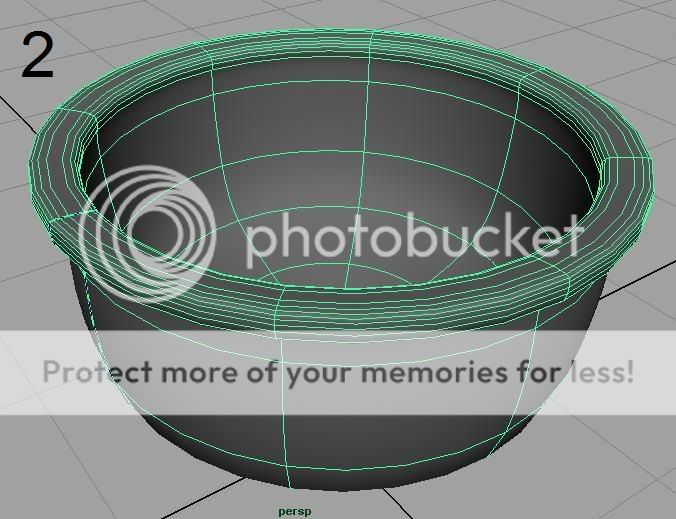
...u have made it!!

3. now comes the part to make it look better.
Selecting the surface by right clicking on it.
Select Hull.
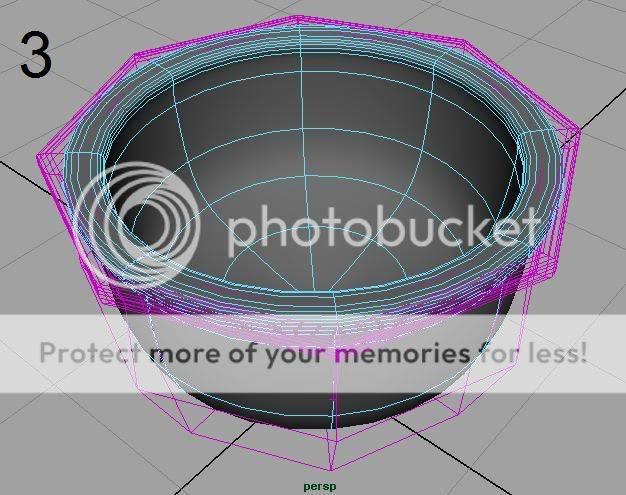
4. Now select according to the figure.To make sure if u r selecting the right ones.. go to resize tool to make sure the direction of the handle and viewport is same.
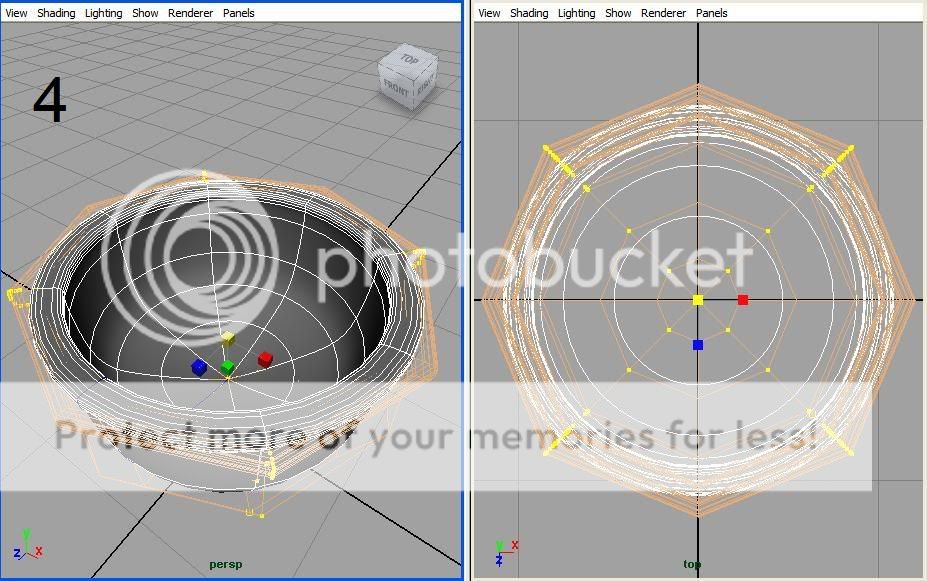
5. Now drag the x and z handle to make the closet more like a four sided rather then circular.
Play with it until u r satisfied!
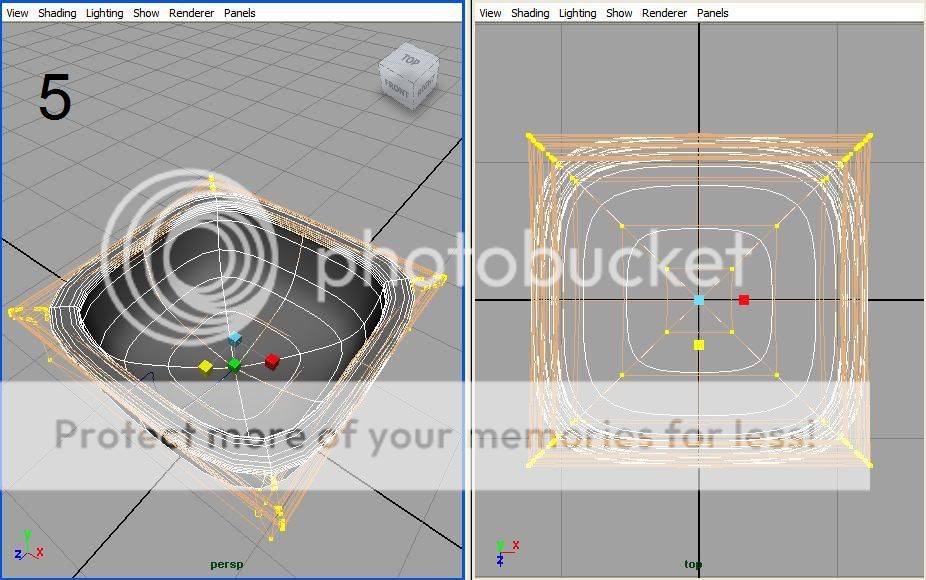
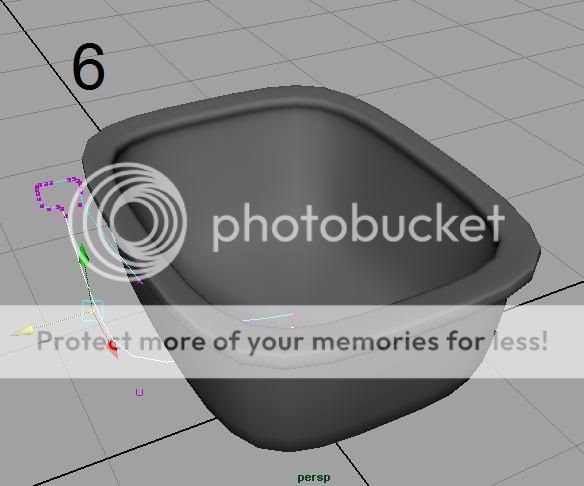
6. Now the final part.
The history(i guess u know the meaning of this term in maya) of the surface is still attached with the curve.So, u can still tweak the curve to make necessary adjustments.
hint: to make sure that u settings are all at default configuration..u can go to maya folder in the documents folder.In the folder naming the version of the maya ur using delete the "prefs" folder...this folder contains all the modifications u made in maya.Deleting this folder means there is no history of ur maya use(beware it removes all the settings u have made).So it creates a default one.

7. Have fun...
Last edited by iamcreasy; 14-06-2009 at 02:45 PM.
#
3
15-06-2009
, 03:33 AM
Registered User
Join Date: May 2009
Join Date: May 2009
Posts: 2
thanks again
nidagal
#
4
15-06-2009
, 05:48 PM
i was also helped in this manner!...
i hope u will do the same for someone else in this manner.....one day
:p
Posting Rules Forum Rules
Similar Threads
Issues for max to maya users
by bertvaneeckhout in forum Maya Modeling replies 23 on 25-09-2014
Maya to AE: Video Screen Tutorial Anywhere?
by lilnyc in forum Maya Materials & Textures replies 1 on 02-01-2014
Online Tutorial and Working Maya at same time????
by srivar in forum Maya Technical Issues replies 4 on 21-12-2009
PLEASE HELP!!! Maya setup (Apache tutorial)
by akeyo in forum Maya Technical Issues replies 5 on 06-09-2009
Maya Doesn't Startup Properly - Just Script Editor
by threedsnack in forum Maya Technical Issues replies 1 on 04-02-2008
Topics
New tutorial - Create tileable textures from photos. Photoshop to Alchemist to Maya 2
By David
Site News & Announcements
5
Free Courses
Full Courses
VFX News
How computer animation was used 30 years ago to make a Roger Rabbit short
On 2022-07-18 14:30:13
Sneak peek at Houdini 19.5
On 2022-07-18 14:17:59
VFX Breakdown The Man Who Fell To Earth
On 2022-07-15 13:14:36
Resident Evil - Teaser Trailer
On 2022-05-13 13:52:25
New cloud modeling nodes for Bifrost
On 2022-05-02 20:24:13
MPC Showreel 2022
On 2022-04-13 16:02:13


